Sunday, October 31, 2010

Meals In Minutes Monday

I don't know about you but after a busy weekend and trying to get back into the weekday routine at work on Mondays I am completely exhausted when I get home. A while back I had dinner at my mom's - without her telling me what she was serving - and I had an amazing dinner and it only took her a few minutes to whip it up. So, I'm going to share this recipe with all of you.

Taquito Enchilada Bake


Servings:4

INGREDIENTS:
1 (20 ounce) can red enchilada sauce
1 (20 ounce) box beef taquitos, Jose Ole brand or 1 (20 ounce) box chicken and cheese taquitos, partially thawed
1 1/2 cups Mexican blend cheese, divided
1 (16 ounce) can refried beans, warm
1/3 cup green onion, sliced
1/3 cup red onion, diced
1 (2 1/4 ounce) can black olives, sliced, drained (optional)
Sour Cream (optional)

Prep Time: 10 mins
Total Time: 35 mins

DIRECTIONS:
Preheat oven to 375°F. Pour 1/3 of the enchilada sauce into a lightly greased 11x7x2-inch baking dish. Arrange 1/2 the Jose Ole Taquitos over enchilada sauce. Evenly spread heated refried beans over taquitos. Mix red and green onions together. Layer 1/3 more sauce, 1/2 the onion mixture and 1/2 the shredded cheese. Top with remaining taquitos and enchilada sauce. Bake, covered, for 25 minutes or until heated through. The last 5 minutes of baking, top with remaining cheese. Garnish with onions and olives. Serve with sour cream if desired.

I hope you all enjoy this dish as much as my family does! Until next time....

Kat

Read more...

Spotlight Sunday-October Guests

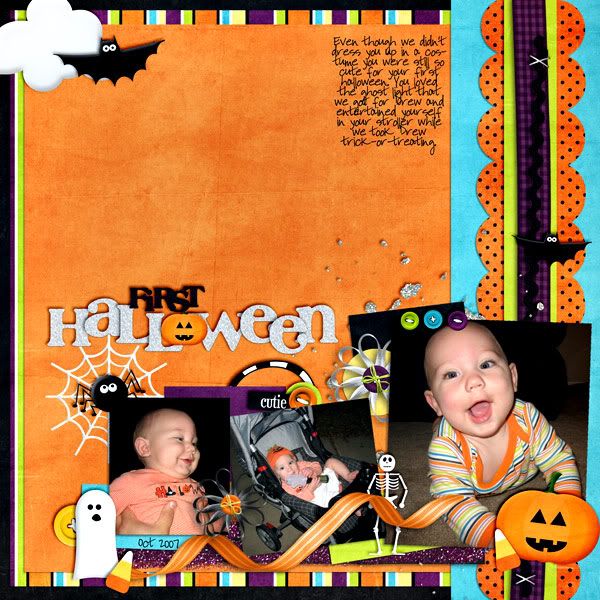
Happy Halloween everybody! Kara here with our spotlight Sunday. First off I hope all your little ghosts and goblins, vampires, and princess, cowboys, and Tinker bell's and so on have had a fabulous and safe Halloween! With October ending, and November approaching fast, I wanted to take today to have everyone take a look at what our wonderful October guest's have been up too. Up first we have an adorable layout by AmberK named

I love everything about this LO! Of course the photos won me over as well, I just love that smile! Be sure to click on the link and leave Amber some love!

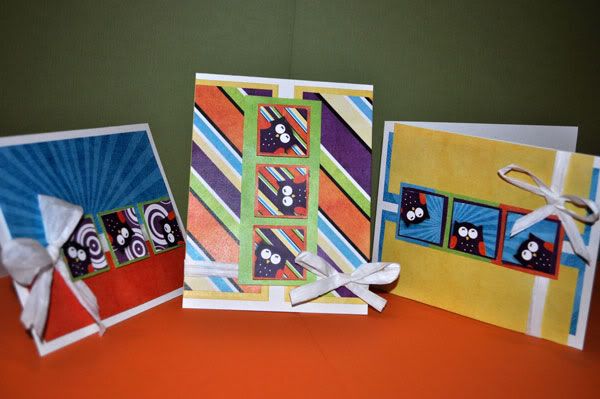
Next up we have Jklmscrapper (Lynn) who made some adorable Spooktactular Hybird cards

I have yet to try Hybird, but one day I am going to give it a shot, Lynn did a wonderful job on these, be sure to leave her some love as well!

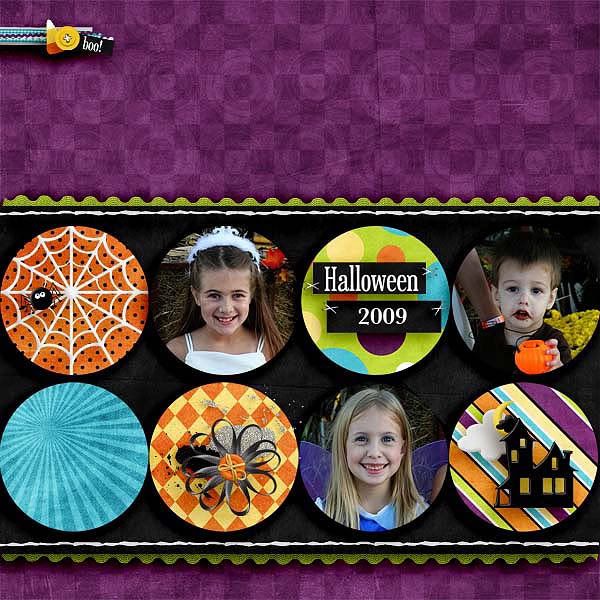
Next, I would like to share Halloween 2009 with you by Candy.

I love how Candy used all the circles for her pictures and elements, a very cute idea! Leave Candy some love as well!!

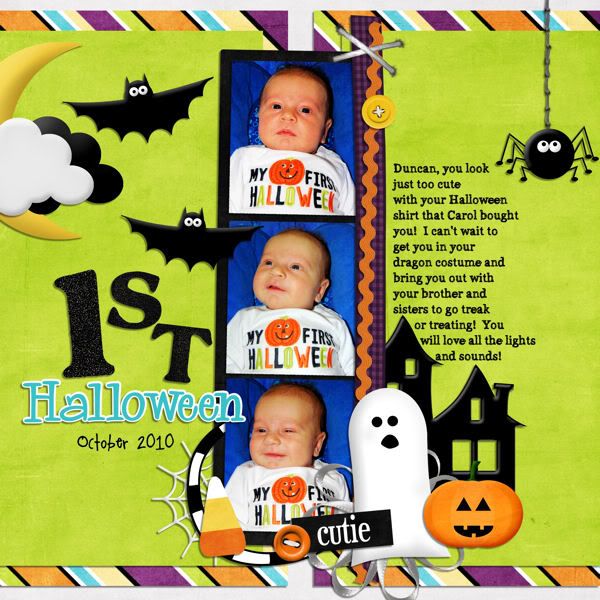
And last but not least, we have StaceyA, who also did a First Halloween layout!

I like the colors StaceyA chose, they went very well with those adorable photos. And even though I hate spiders, I like how she placed that cute spider on the page!! Stop by and leave some love for StaceyA too!! Okay, so there you have it. Some of the wonderful work they sweet ladies have made for us for the month of October! Thank you ladies, we appreciate your hard work! Until next time, have a great day!

Kara

Read more...

Saturday, October 30, 2010

Saturday School: Paper Rosettes!

I admit it. I have an affinity for making paper flowers. There's something really satisfying about turning a plain piece of paper into a pretty little flower. I love using paper flowers to embellish cards and frames and, well, pretty much any surface that doesn't move.

A friend of mine suggested I write a tutorial on making paper rosettes, so that's what I'm doing today. They're really easy and add a sweet little touch to any project.

At the bare minimum, you need paper, scissors, and adhesive (I like glue dots for these). I also used reverse-pinch tweezers and a Nestabilities scalloped circle die. If you have a circle or scalloped circle punch or die, you can use that. But if you don't have those, simply trace a circular object, or even just freehand a circular shape. Once you have your circle, you want to cut it into a spiral. I just eyeball mine, but for illustration purposes I drew a spiral using a pencil.

Now you're ready to cut. Start on the outside and cut toward the middle. You'll end up with a spiral that looks something like this one.


Now it's time to roll up the spiral. I have these fantastic tweezers that work in reverse - you pinch them to open them. They're awesome for this kind of project. You could also use a quilling tool, should you have one at your disposal. I don't (yet), so I rely on my trusty tweezers. Start in the middle and roll tightly to the end.

If you want a tightly rolled flower, add the glue dot to the end and then adhere it to the side of the flower. If you want a more loosely rolled flower, let the paper unroll and then add your glue dot.

Now you can add your sweet little paper rosette to any project you can dream! I used the sketch from Mojo Monday 162 and Jennifer's awesome Splendiferious collab with Jenn Barrette to create this card. The sentiment is from the TinyAnd2Cute set by The {Stamps} of Life.


Well, there you have it! If you make these paper rosettes by following this tutorial, come back and leave a comment with a link to your project - we'd LOVE to see what you created!

Read more...

Friday, October 29, 2010

November Desktop Freebie

Hey everyone! Sally here today to bring you the November Desktop freebie from Jennifer! With most of the US being well into fall, I decided to take Jennifer's gorgeous collab with Jenn Barrette and turn it into a more versatile destop with no calendar. I hope you enjoy!


Click on the Preview to download!

Read more...

Thursday, October 28, 2010

Some Templates and a New Pretty Bloggie

Good morning everyone! Jennifer has a new set of templates for you today, and a new addition to her Pretty Bloggie Series. This time around, Jennifer has taken HER inspiration from her CT and created a set of 4 templates based on layouts she found in the team's galleries.

And here's a look at what some of the other CT members did with these templates


Next up, CT chickie Leah created another gorgeous Pretty Bloggie for us. I love this kit, and it'll make any blog look completely fabulous.

Don't forget that both of these products are 20% off today ONLY....so head on over to Jennifer's Store at The DigiChick and pick them up!
Until next time!

Read more...

Wednesday, October 27, 2010

Another Hybrid Wednesday

Hi folks, Donna here sharing with you a hybrid card I created using Such A Hoooooot.


I just printed my card (4x6) and some elements coz I wanted to add dimension on my card.


Here is my card that I adhered on a white cardstock and just rounded the two corners for a softer look. As it is, I think it's an okay card....


Adhering foam tape to some of the elements like the leaves, owls and the small blue heart definitely adds dimension to your finished card....

Hope you got inspired by this simple hybrid card! Don't forget to share with us whatever you create using any of Jennifer's digital kits like Such A Hoooooot! :)

Read more...

Tuesday, October 26, 2010

Tidbit Tuesday: Removing a Background

Hi Everyone!  It's Jenn (jk703) here with your tidbit for Tuesday!  I was here on Saturday and shared a little information on the Lasso Tool, and it's friends:  Polygonal Lasso and Magnetic Lasso.  I'm here today to share how to do a quick removal of a photo's background!  So bear with me and all the red that you will see shortly!  I sure should remember to change the mask color in Photoshop soon!  Goodness...

Anyway... Here is where we start! First, open the photo that you want to remove the background on.  Here is mine of my little boy, Colin!


Once you choose the Magnetic Tool, you should start clicking around the image that you want to stay, and the background behind will be removed. For my example, I am clicking around Colin's body, and moving around his clothes.  (Sorry, my screen capture below also captured me getting my selection, so I have a few extra magnetic tool squares, lol!):


Once you have clicked all the way around, you will get those fabulous marching ants... now -- who would have thought ants could be fantastic!  Once you are at this point, this is what you should see:


You can see though, in the image above, Colin's treasured stick was not fully captured.  So... if you press Q on your keyboard you will be brought into mask mode.  This allows you to easily make changes to the image and what is or isn't included within your marching ants.  Painting with white removes the ruby red mask, and painting in black adds ruby red to the mask. I need to remove the mask on the stick, so I am painting with white.  


Here is my full mask after I zoomed in and re-captured the stick in his hand. Looks funny right... I know... lol!  Now when you do this, you can go around to all the edges and be as specific as you like.


After you have completed mask edit, you can soften the edges by adding a slight Gaussian Blur to the image.  Still in the mask mode, click on Filter > Blur > Gaussian Blur.  Bring the blur down to .5 pixels just to soften the edges.  It is up to you how much you want to use, so play around until you find what you like!


Click ok, and the blur is set.  Next press Q to quickly get out of the Mask Mode.  You will see your image with the marching ants again.  Making sure your photo is selected, all you have to do is hit delete on your keyboard and the background will be removed to the clear pixel view.  Now, just add papers, put your image in a layout or you could blend it into the paper... so many ideas!  Here is Colin, removed from the woods!


Hope you enjoyed a quick way to remove a background from a photo!  You never know what you might catch behind your subject, it might be good to know how to remove it!  LOL!
Have a great Tuesday everyone!  Til next month!

Jenn
(jk703)

Read more...

Sunday, October 24, 2010

Monday Meals in Minutes

For Monday Meals in Minutes today I am going to link you up to some great sites (I have found that most foodie companies will have recipes on their websites so if you like a product check the website) that I use all the time to search for easy peasy recipes. Plus add in some great on the go type meals that we do on weekdays here at my house.

Weekday ideas:
1. store bought tomato soup made fancy with a side of garlic bread to dip in spicy olive oil (or the soup)
2. simple quesadillas (take 2 tortillas and add in some cheese, onions, tomato, shredded chicken and place in skillet for a few minutes on each side then slice up with pizza cutter) with rice on the side
3. calzones (use frozen pizza dough to roll out on cookie sheet then add your filling and fold dough over filling then bake at 350 till brown on top)

Websites:
http://www.foodnetwork.com/
http://www.kraftrecipes.com/home.aspx
http://www.chefchloe.com/
http://www.rachaelray.com/
http://allrecipes.com/
http://www.epicurious.com/
http://simplyrecipes.com/
http://www.cookinglight.com/
http://www.bettycrocker.com/

Believe me their are TONS more...search for a certain type of cuisine or by the name of a chef...even some restaurants will list a recipe or too. Most of all have fun in the kitchen and don't be scared to try something new!

Read more...

A Spooktacular Sunday Spotlight!

Stephanie here with the spotlight on Jennifer's latest re-release Spooktacular! I LOVE this kit for so many reasons! Of course, it's one of the cutest Halloween kits I've ever seen with the bold colors and adorable elements, but it's FABULOUS for those hybrid projects I like to do this time of year. And I love that there's a skeleton spooky enough for my son, but not too scary for my daughter! :)
Here's Spooktacular...


And here's a layout I made with it and an easy hybrid project from last Halloween (I liked it so much, I'm using it again this year!)


So be sure to check it out when you're looking to scrap something spooktacular! :)

Read more...

Saturday, October 23, 2010

Saturday School: Tool Time - Lasso Tool

Hello, Hello!  Happy Saturday!  It's Jenn (jk703) here with a quick post about the Lasso Tool!  Just a few pointers and tips about that cool tool!  Here goes!

First, the Lasso Tool looks like this:


The first tool is the Lasso Tool and allows you to draw free form selections.
The second is the Polygonal Lasso Tool and this one allows you to draw selections, but they will consist of line segments.
The third is the Magnetic Lasso Tool and allows you to make selections based on the edges; almost as if you are tracing the edges.

The same selection tools available for the Marquee Tool are available for the Lasso Tools.  This allows you to add, subtract and change your selections.


One great tip for me helps with lines.. To Create straight lines hold down the ALT/OPT key as you draw the path. What this does is -- it toggles between the standard tool and the Polygonal Tool. Presto - straight line!  Woot!

What can the Lasso tools do for you?  Here are two easy things it may help out with:

Creating your own custom Shape:  
Create a new transparent layer by clicking the Create a New Layer icon in the Layers Panel, then you can click on the Polygonal Lasso tool. 

In the Menu Bar, set the Feather to 0 and choose the New Selection icon in the Options bar. (A Feather at 0 is a basic hard edge, while the higher the number, the softer the edge will be).

Click four times (or however many you need for your shape) on your new document to create the four corners of your shape and then double-click to close the shape.

Next, you will choose the Paint Bucket tool and click inside your shape to fill it with the foreground color.  Press Enter. 

Here is the Feather at 0, with the marching ants, and then filled with the Paint Bucket:


Here is the Feather at 5, with the marching ants, and then filled with the Pain Bucket.  As you can see... it really takes the hard edges off with just a little higher feather!  Play with the settings and find your perfect number! 


Press Ctrl D (Cmd D) to remove the selection.

You can use your new shape to clip papers or photos, or make and edge template!  

Many times you will get Alphas or even embellishments for kits on a single sheet.  This sometimes helps to see everything.  How do you move things from that sheet to your page... Here's how:

Alpha Full Pages:  Moving Single Letters

First, you need to open  the png Alpha file.
Select your Lasso tool (or your Marquee Tool -- whichever you prefer).
Click and draw your lasso around the letter you want to use in your layout.
Once selected, you should see the marching ants around it (meaning it is the active selection).
Choose the Move Tool and drag the letter onto your layout. It will be added on its own layer.
Repeat the steps for additional letters.


One Tip when moving letters... as with any moving in Photoshop:
If you want your letters to be centered on your layout, hold down the Shift key as you drag it from the png file to your layout. 


Hope you enjoyed my bits about the Lasso Tool!  On Tuesday, I will be sharing how to use the Lasso tool and removing a background from a photo!  Hope you come back to read it!

Have a great weekend!
Jenn
jk703


Read more...

Friday, October 22, 2010

A Friday Freebie from Me!!!

Hi there, everyone! Today I'm bringing you a freebie (a tad late, but better late than never, right???). This cute, glittery alpha coordinates perfectly with my full kit, Spooktacular, but it will go great on any layout where you want your title to shine.

Image and video hosting by TinyPic


I hope you enjoy this alpha! Feel free to link me up to any layouts or projects that feature it. I always love to see your work! Have a fabulous weekend!


Read more...

Thursday, October 21, 2010

Spooktacular and Such a Hoooooot!

Hey everyone! Jennifer has some great re-releases today. Two really cute kits and one Pretty Bloggie set. Up first, is Spooktacular.

Here's some pages Jen's fabulous CT came up with using Spooktacular

Next, Jen's re-releasing the oh so adorable Such a Hoooot!

And some inspiration from the CT

And finally, for those who want to add a touch of fall to their blog, Pretty Bloggie featuring Such a Hooooot!


Have a great weekend, and I'll see you soon!

Read more...

Wednesday, October 20, 2010

Oh So Easy Halloween Hybrid Craft

Hi everyone!  Jackie (tettletop20) here with some hybrid inspiration for you.

Friends of ours have a Halloween party each October and we all make special treats to ewwh and ahhh over.  I found what I was going to make through a blog I came across a few weeks ago and I just knew I had to make some fun little tags to note what each treat was for the party guests.

I started off with my supplies - tags created with my photo edited software using Jennifer's kit Spooktacular (coming out tomorrow!!), toothpicks, scissors, punch, and adhesive:


I cut out the circles along with some plain circles for the back side and also cut out the square pieces.  To make the circle tags, I added some adhesive to the back of one of the circles, placed the toothpick in the center, and then added the second circle to the back.  For the squares, I marked the halfway point and then scored it and folded.  


Here's how they looked when I added them to the tray and goodies I took to the party!

See how easy they were to make?  Now you go try some!  Happy crafting!

Read more...

Tuesday, October 19, 2010

Tidbit Tuesday 10/19

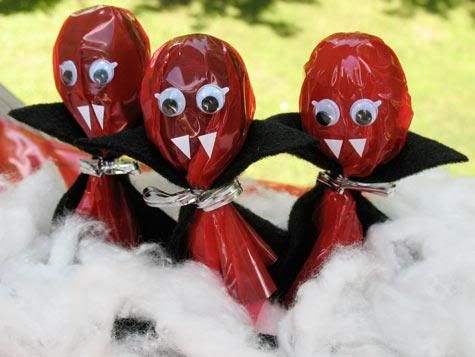
Hello all, Kara here with your Tidbit Tuesday. Halloween is just a little over a week away, can you believe that? Yeah, I can't either. I have been browsing sites to find some cute crafts I can do with my son, who will be 6. I can across http://www.kaboose.com/ It's a great site with lot's of fun crafts. We have yet to do this craft, but we will  soon. I thought I would share it with y'all. It's called Vampire Lollipops. These vampire's are not scary, they are actually cute! 

What You'll Need:
Red cellophane
Lollipops (as mas as you'd like)
Black felt
Twist ties
White address labels
Scissors
Peel and stick wiggly eyes

How To Make It:
1.Using the pattern, cut shapes (1 for each lollipop) from black felt
2.Cut a piece of cellophane into a square, large enough to wrap around the head of the lollipop (see photo)
3.Loosely wrap the cellophane around the lollipop and place the wrapped lollipop onto the felt cape (see photo)
4.Wrap twist tie around both at the neck of the lollipop (see photo)
5.Cut fangs from white address labels and stick to the front of the lollipop.
Attach peel and stick wiggly eyes to the front of the lollipop (see photo)

Tips: 
1. To add some variety, try using different color cellophane such as red, green, or purple.
2.Bend the end of the twist times to look like bow ties.
3. Try creepy eye Halloween stickers, other than wiggly eyes.

And there you have it. My son is excited to do this craft later this week. Please, if you do this craft with your kiddos, be sure to stop by and show us your photos. Have a great day! 


Read more...

Monday, October 18, 2010

Easy Weeknight Dinner

Hi everyone. Kiki here with a Meals in Minutes recipe for you from the Food Network Magazine that I have just fallen in love with.

It's so easy to make - all you need is a rotisserie chicken from the grocery store and a few staples and you've got a delicious meal for the family.


Spiced Couscous and Chicken

  • 3/4 teaspoon ground cinnamon
  • 1 teaspoon ground ginger
  • Kosher salt and freshly ground pepper
  • 4 medium carrots, thinly sliced
  • 1 cup couscous, preferably whole wheat
  • 2 cups coarsely shredded rotisserie chicken
  • 3 tablespoons unsalted butter
  • 1/2 cup sliced almonds
  • 1/4 cup golden raisins
  • 4 scallions, white and light green parts only, roughly chopped
  • 1/2 cup roughly chopped fresh cilantro, plus more for topping
  • Greek yogurt and/or harissa or other hot sauce, for topping
Bring 2 1/2 cups water to a boil in medium saucepan over medium-high heat. Add 1/2 teaspoon cinnamon, the ginger, 1 teaspoon salt and 1/2 teaspoon pepper. Add the carrots and cook until crisp-tender, 3 to 4 minutes. Drain the carrots, reserving the cooking liquid.

Put the couscous and chicken in a medium bowl; pour 1 cup of the hot cooking liquid on top. Stir, then cover tightly with plastic wrap and let sit 5 minutes. Fluff the couscous with a fork.

Meanwhile, melt the butter in a medium skillet over medium-high heat. Add the almonds, raisins, scallions and the remaining 1/4 teaspoon cinnamon. Cook, stirring, until the nuts are toasted, 2 to 3 minutes. Stir in the cilantro.

Divide the couscous and chicken among bowls. Top with the carrots and more of the cooking liquid. Sprinkle with the almond mixture and more cilantro. Top with yogurt and/or harissa.


I've changed this up a few times by using cashews instead of almonds and adding some red chili flakes for more of a Thai flare. I hope you enjoy this recipe

Read more...

Sunday, October 17, 2010

Spotlight Sunday

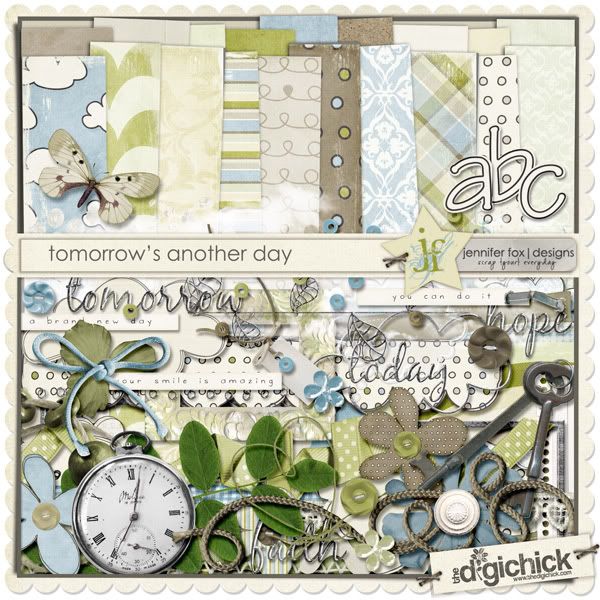
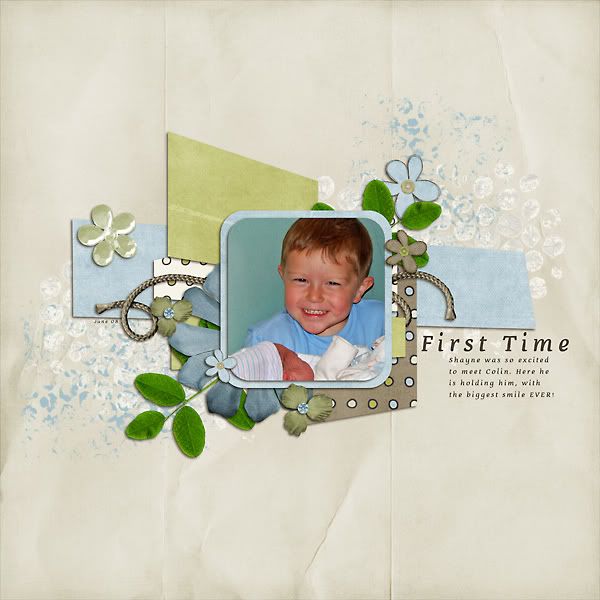
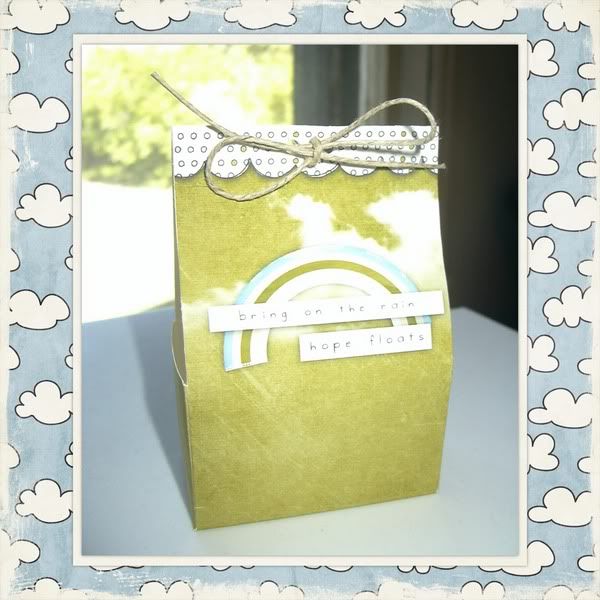
Hello my fellow scrappers, Kara here Jennifer's newest blog chick. I thought that today I would share one of my favorite kits of Jennifer's. Tomorrow's Another Day  I love the soft colors, the unique elements and all the word strips!! I had tons of fun working with this kit, and I know other people have too! Below is the kit itself, and some layouts for your viewing pleasure! I do hope you all have a wonderful Sunday!!


First Meeting by Jk703 (Jen) 


A hybird layout by Sarahbhb
Hope Floats Treat Bag

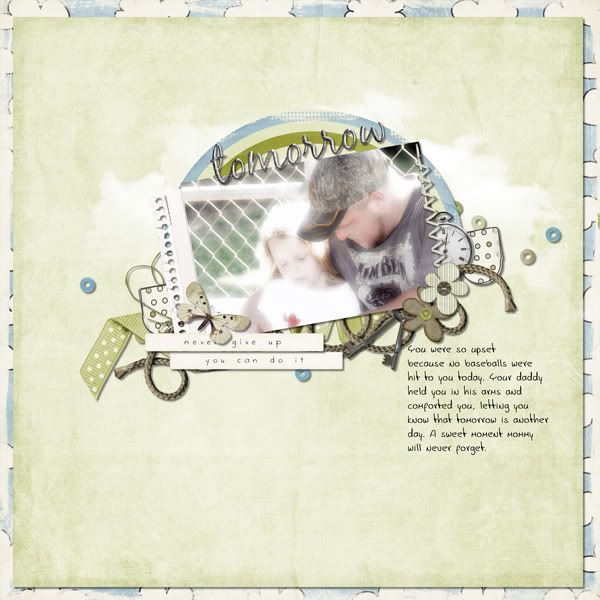
and Never Give up by Kara (That's Me)


Read more...
Related Posts with Thumbnails

Disclaimer

As a creative team member for several digital scrapbook designers, I have received their products for free in return for creating and posting projects (digital layouts, hybrids projects, etc). Many of the layouts you see here were done in conjunction with requirements for these creative teams. Please be advised that the products used were indeed received for free.
The Daily Scrapper - Topsites Best Scrapbooking Sites, Digital Scrapbooking, Scrapbook Supplies, Reviews, Awards
List of the Best Digital Scrapbooking Websites by Scrapbook MAX!SCRAPBOOKING TOP 500 The Daily Scrapper - Topsites Free Digital Scrapbooking

  © Blogger templates Newspaper III by Ourblogtemplates.com 2008

Back to TOP