Boy oh Boy do I have LOTS of stuff for you today!! I'm not going to waste any time, so let's just get started, ok?
Ok! Here we go! First up, Jennifer's Lovies have gotten together and made a massive collection of templates for you! FIFTEEN templates in all! There are 3 zip files, so make sure you get them all!
 Template Zip 1
Template Zip 2
Template Zip 3
Ok, did you download them? Great!! Now, some of you might be wondering what in the world do you DO with a template? What's the point? How do I use it? What's the deal with all those layers and stuff? Well....I just happen to have a template tutorial for ya! (It is Saturday after all, Saturday School day here at the Jennifer Fox blog!) So...check it out! I hope it's helpful for ya!
For this tutorial I will be using one of Jennifer’s new templates, available in her new Grab Bag and her Color Burst bundle. Both are available at The DigiChick. This tutorial is written using PSE 6, but the concepts work in all versions of PSE and most versions of PS.
Open your template and decide which photos and kit you want to use. I’m writing this as I would complete the LO, so you should of course feel free to change things up to suit your style and needs.
Ok, let’s get started!
On your template, select your background layer.
 Choose your background paper and open it. Using your move tool, drag your paper into your template and arrange it so that it covers the background layer.
 Making sure that your paper layer is active (highlighted), click control+g to clip the paper to the background layer. Then click control+e to merge it down. You’ll be using this action a lot when using a template.

Repeat this step for all of the background paper layers.
Once you have all of your background papers in place, open as many photos as you will need for the template.
In the template layer palette, click on the photo layer where you want to place your photo.
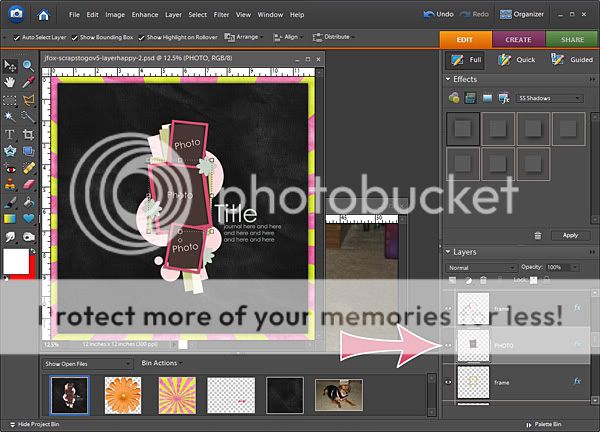
Using your mover tool, drag your photo onto your template and rotate it to match the photo space on the template. Resize a bit as well.
Make sure your photo is the active layer, and hit ctrl+g. This will clip the photo to the template space, but will allow you to resize and move the photo until it’s exactly where you want it. Once you have it positioned, hit ctrl+e. Your picture will now be in place on the template.
Repeat this step for any other photo spaces on your template.

Now we’re going to do the element parts of the template. I usually start with any ribbons or paper strips. These are interchangeable on a template. But, how you do them is different, so I’m going to do both for you. The template I’m working on has 3 ribbon/paper strips, so I’ll do two as papers and one as a ribbon.
Open your paper or ribbon into PSE or PS. Select the ribbon/paper strip layer you want to use in your layer palette.

Drag the paper you have chosen to use onto the template using the mover tool. Make sure that it covers the entire ribbon/paper strip layer. Hit ctrl+g and ctrl+e. You now have a paper strip. Repeat this step for any other paper layers on your template.

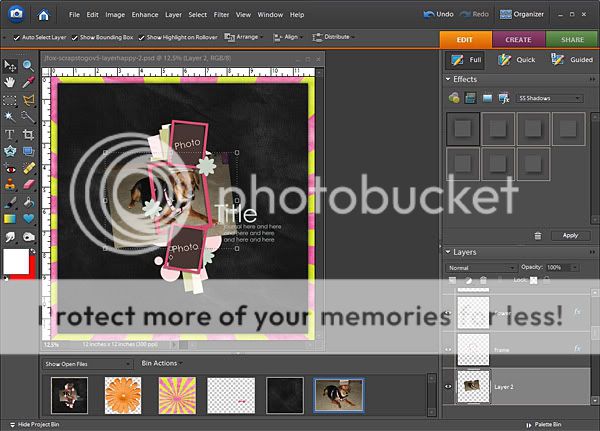
Now we’re going to do a ribbon. This is a little different from papers, because you can’t clip the ribbon to the template layer, you have to replace it. Once again, select the ribbon layer on the template. By doing this, when you drag your ribbon element in, it will be on top of the template layer, and the final layering of your layout will match the template layering.
Drag your ribbon element onto the template and place it over the template layer. You can rotate and resize so that it suits you.

Now, as you can see my ricrac is longer than the ribbon layer on my template, so I’m going to use my eraser tool to fit it how I want it. The other thing you can do here is to use your selection tool, select the area of the ribbon that you don’t want, and delete it. Once I got rid of the excess ribbon, this is what my page looks like.
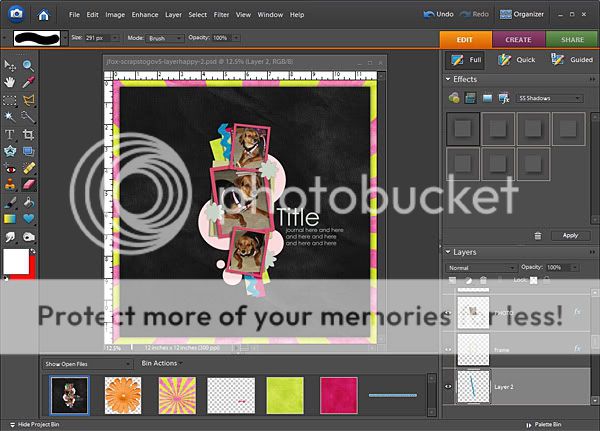
Hide the original layer on the template.
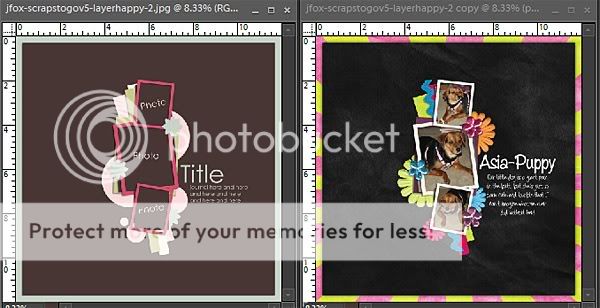
Now you are ready to do the rest of the elements on the template. Some templates, like the one I am using, have paper shapes that you can clip papers to and leave as shapes, but you can also replace them with elements like the ribbon we just did. Once you have done all of the elements on the template, make sure you go back and shadow. If your template has shadows on the layers, if you clip a paper or photo to the layer, the shadow will be there. When you replace the elements, you can copy the layer styles from original template layer and paste them onto your elements. If the template you’re using doesn’t have shadows, you can shadow as you normally would on any layout. After you’ve done your shadowing, go back in and add your title, date, and any journaling you’d like to have on the layout.
Using templates shouldn’t be hard or scary. Once you get used to using them, you can go from template to beautiful finished layout in no time!
Remember that you do not have to use a template exactly as it is. They are a great jumping off point, and you can remove or add elements, move them around, change them, whatever you want to do with them to make them your own!
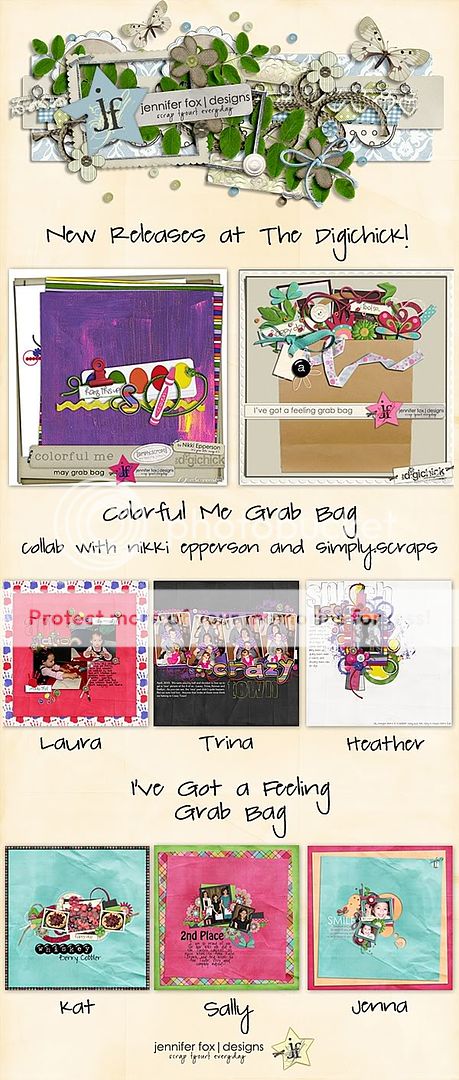
Ok! So...now you have a whole bunch of templates, cause you've downloaded our freebies, and you know how to USE a template, cause you've read my tutorial. NOW, you need some stuff to put ON the template, Right? Well, you're in luck! Jennifer has TWO fabulous Grab Bags out today! One is a 3way collab with the fab Nikki Epperson and the amazing Laura of simply.scraps, called Colorful Me. It's chock FULL of fun papers, elements, and TWO alphas!! The second Grab Bag, is a solo effort from Jennifer, and is fresh and funky as only Jen knows how to do it! Take a look at the previews and what Jen's CT has done with these awesome Grab Bags!
Told you this was a great day at Jennifer Fox Designs, didn't I? Now you have templates and you know how to use 'em and you've seen the FAB stuff that Jen has new in her store today, well, NOW you need a sale, right?!? Well, guess what?!? Jen is having a sale! Today ONLY! Jennifer's ENTIRE store is on sale 30% off. You do not want to miss out on this sale, I promise!

But wait!! There's MORE!! Today and tomorrow, you can use this coupon code and get an EXTRA 15% off Jennifer's amazing designs. So what are you waiting for?!? Click the coupon below to head on over to Jen's store at The Digichick! Go! Go! Go!

Happy iNSD everyone! I hope you have a great day of shopping, scrapping and fun!
Sally :)
Read more...


