Tidbit Tuesday.... Creating a Vignette

First, open a photo that you would like to work with. Then you will now create a new layer above your photo. Next, I chose the new layer, then chose the color I wanted the vignette to be. For this example, I chose white.
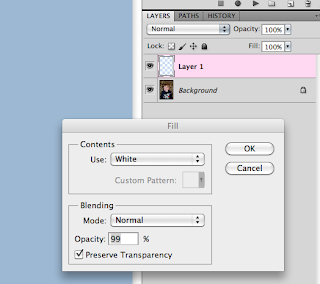
I clicked on my paint bucket, and filled in my new layer white. You can pick whatever color you want, by using the eyedropper tool, and moving and adjusting what color spectrum you want to use. You can also pick a color from the photo itself.
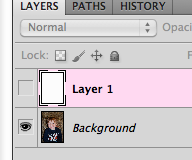
After my layer is white, I turn off the visibility of the white layer, my to-be-Vignetted layer!
You should now be looking at your picture again, and your Layers Palette will look like this:
On the toolbar, choose the Elliptical Marquee Tool:

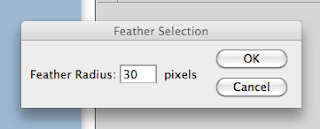
Now, Click in the Top left of your picture and drag to the opposite corner of your picture. You should have an oval of moving ants on your picture. Once you have this, you can nudge and move the oval around to where you would like to Vignette to be placed on your photo. Under the Select Meanu Heading, choose Modify and then choose Feather. You will start with a feather of 30 pixels. You can play around with this number, depending on how much of a vignette you would like.
Now with your To-Be-Vignetted Layer selected, all you have to do is click on Delete. It should remove the selection inside the oval that you created. Your oval should show off the portion of the photo you wanted in the Vignette. Here is mine:
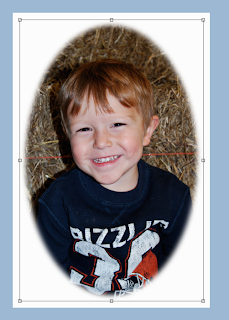
How easy was that?! You can change the shape, the opacity, add a pattern, whatever you want... try using a paper! Here is one with a tan color, and 170 feathering.
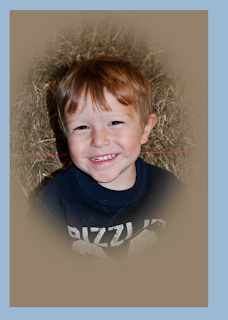
One last item... Say you spent a lot of time on your vignette, used different opacity levels, colors, and more... and you want to use it on another photo... You can save it for future use! Just turn off all the layers except the Vignette Layer in the Layers Palette, and Save As. Remember to save as a .png, and where you saved the file to!
Thanks for visiting and have a great Tuesday!
Jenn (jk703)


0 comments:
Post a Comment