


Saturday School--Scrapbooking Style!
Hi everyone! Sally here bringing you a scrapping tutorial. We've all seen those tags in kits and bits of string, but how do you actually HANG those tags from the string? Well I've got a short tutorial here to show you how. Now, most of the time, when you find a tag in a kit, it has a hole in it already. But, what if you have a cute word strip or other kind of element that you want to hang from a string? This tutorial will show you how to do that too, so let's get started.First, you need to open up your elements. For purposes of this tutorial, I just did this on a blank canvas. Now, notice that my element doesn't have a hole in it to hang it from. What you want to do, is grab your eraser tool, and make it just slightly larger than the size of your string. Make sure you're on the layer with the element, not the string, and place your eraser tool where you want the hole to be. Click once, and you will have a perfectly round hole in the element.
 Next you want to arrange your element where you want it to hang on the string. We all know that most things don't hang perfectly straight, so give it a bit of a twist so that it looks like it's hanging naturally. While you're doing this, pull the element layer under the string layer.
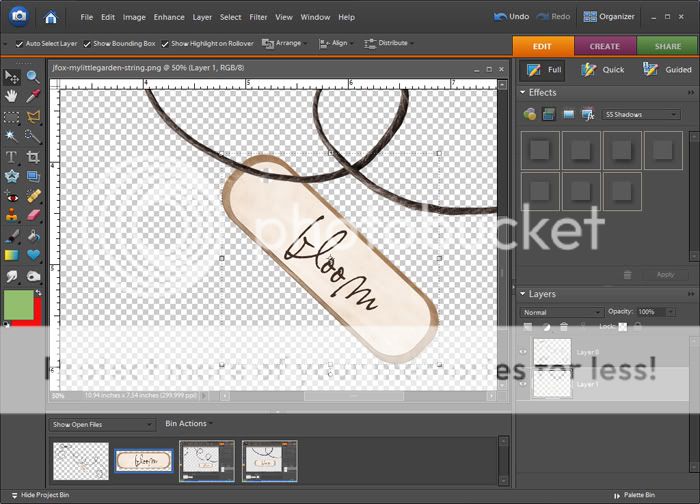 Now you want to zoom in pretty close. I zoomed all the way in to 200%. You also need to lower the opacity of your string layer. I lower mine pretty low so that I can see the edges of the tag behind it.
 Now using the eraser tool, I erase the string on one side of the hole, so it looks as though the string is passing through it. Don't erase the string IN the hole, because well, if it were a real string and tag, you'd see the string through that hole. Make sense? Good! lol I added a colored background here because the tag was a light color, and it was blending in with the transparent background. That's just to make sure I'm not erasing too much of the string and leaving a gap.
 Ok, now we've got the tag hanging on the string. It's time to add shadows. I shadowed my tag and my string, but if you'll notice, there's an errant shadow hanging out there on top of my tag, that shouldn't be there.
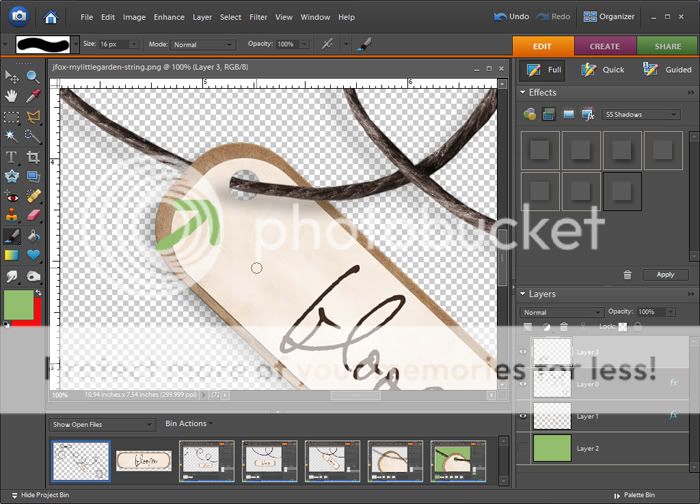 This is how I fix that. Duplicate the string layer. Clear the layer style from the TOP string layer. Then make sure the BOTTOM string layer is selected, and carefully erase on that layer where the shadow is, until the shadow is only showing where the string is actually on top of the tag. Once I'm happy with how the shadow is, I merge the two string layers.
 And that's it! Now my word strip is hanging in a natural way from my string!
 Have fun with this. You can hang more than just tags from strings. Paper elements, word strips, or even photos look cool when they hang from a string or ribbon. If you do a layout using this tutorial, leave a comment with a link so I can go and leave you some love! Happy Scrapping!
Until next time
Sally :)


3 comments:
Great tut! Thanks so much!
thank you so much! Very easy to follow!
Just a quick note to let you know that a link to this post will be placed on CraftCrave today [10 Apr 02:00pm GMT]. Thanks, Maria
Post a Comment