Saturday School: Watermarking
Hi Everyone! It's Jenn (jk703) here to bring you this edition of Saturday School! Woot! How is your weekend going! I hope well! Since I've started digital scrapbooking, I've noticed that I'm really getting into my cameras, photo actions and the actual editing of my pictures! I like to take different shots, fun angles, and try out the different settings on my camera!
Since we have so many photographs we are posting to show-off online, like the popular P365 challenge or a even a single picture challenge in the digital scrapping forums, there may be times that you want to protect your photographic work! What I mean about protections is trying to disable people who might want to use them without your permission. Today, many photo sites that you are uploading your photos too also provide options for protecting your work. They offer an option to disable the "Right Click Feature" is really a helpful tool! One that is available to us, and easy to do ourselves is Watermarking!
Watermarking has it's good and bad points, but it is your decision. Here is a quick list of pros and cons.
No Watermark:
- Watermarks sometimes are considered annoying and distracting to the image.
- If someone wants to “steal” the image, they can likely remove the watermark anyway.
- The image may not hold specific value and you just want to share it.
- A watermark is a notification that the image is protected under a copyright.
- Watermarking is part of showing your brand.
- If someone does take the image and forward it to someone else, they will see it and may go to your site based on your watermark.
- There is also a notion that adding a watermark makes you appear professional. (That is more of an opinion).
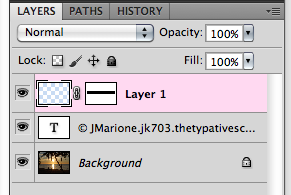
How to Add a Text Watermark in Photoshop:
Open the photo you wish to protect.
- The Windows keyboard shortcut for the copyright (©) symbol is Alt+0169 (use the numeric keypad to type the numbers). The Mac shortcut is Option-G.
- Remember to click on the Color Swatch and set the color to 50% gray or another color of your choosing.
- Take the time to resize and place the text where you desire.
- Save the watermark as it's own file or png to use it over and over again!


1 comments:
Just a quick note to let you know that a link to this post will be placed on CraftCrave today [07 Feb 12:00am GMT]. Thanks, Maria
Post a Comment