Saturday School - Adding a Border to Photos
Adding a Border to Photos or Elements in PSE
Hey Everyone!! Michelle (aka mdel) here with a tutorial for y'all.
Have you ever wanted to add a border to a photo or element to help
give it a little pop? From time to time I find myself adding an
alpha to one of my layouts only to notice that it is getting
a bit lost on the page. Today I thought I'd share an easy tutorial for adding a border
around a photo, element or alpha.
Let's get started...
To begin, open Photoshop Elements and a photo. I currently use PSE 7.0 but I have used
this technique in PSE 5.0 as well. Make sure your layers palette is visible. If the
palette is not visible go to Window>Layers which will open the layers palette.
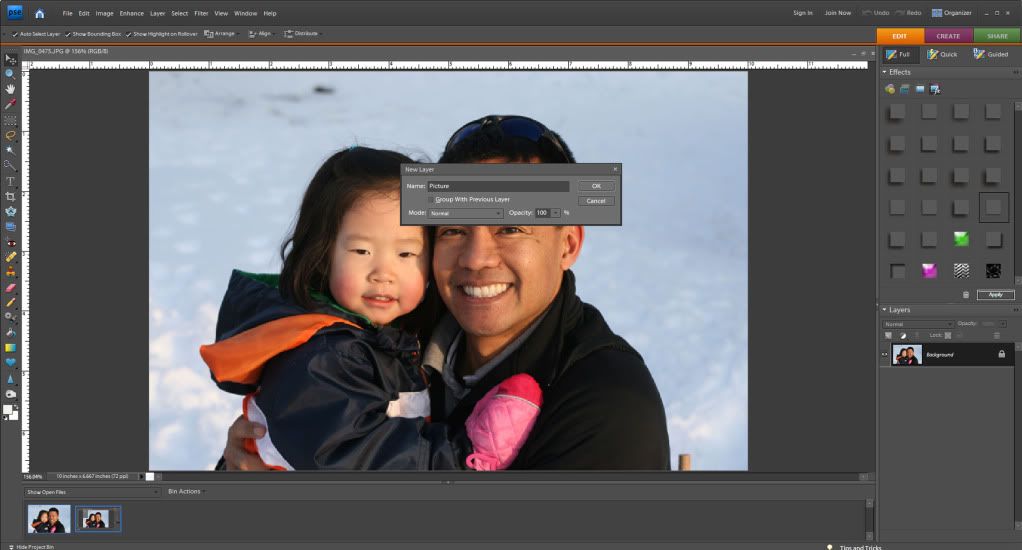
Next click on Layer>New>Layer from Background.

You can now give your photo layer a name (doesn't really matter what you choose)
and then click "ok" to close the dialogue box.
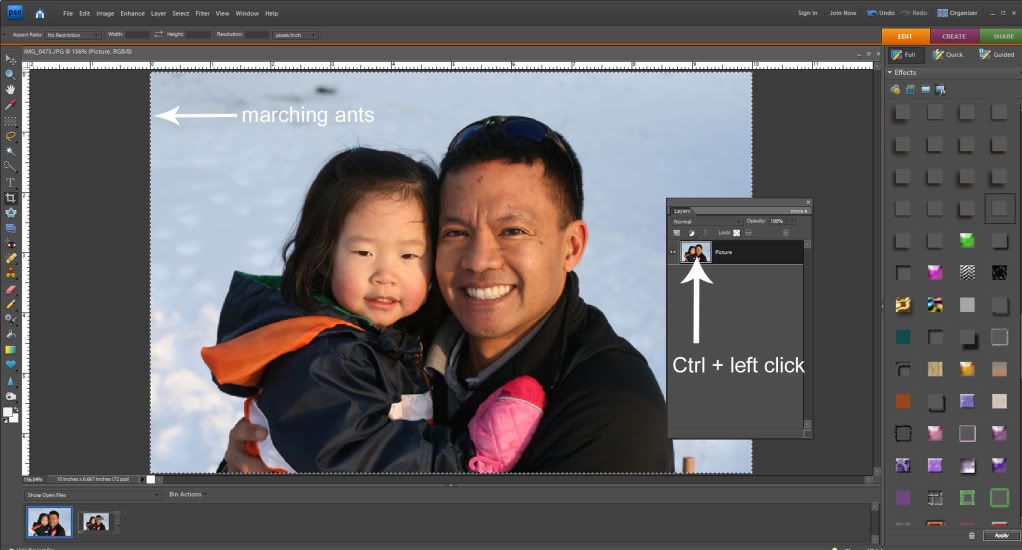
Hold down the Control (Ctrl) key and left click your mouse on the photo
layer icon in your layers palette. This will bring up what are referred to
as "marching ants" around the edge of your photo.
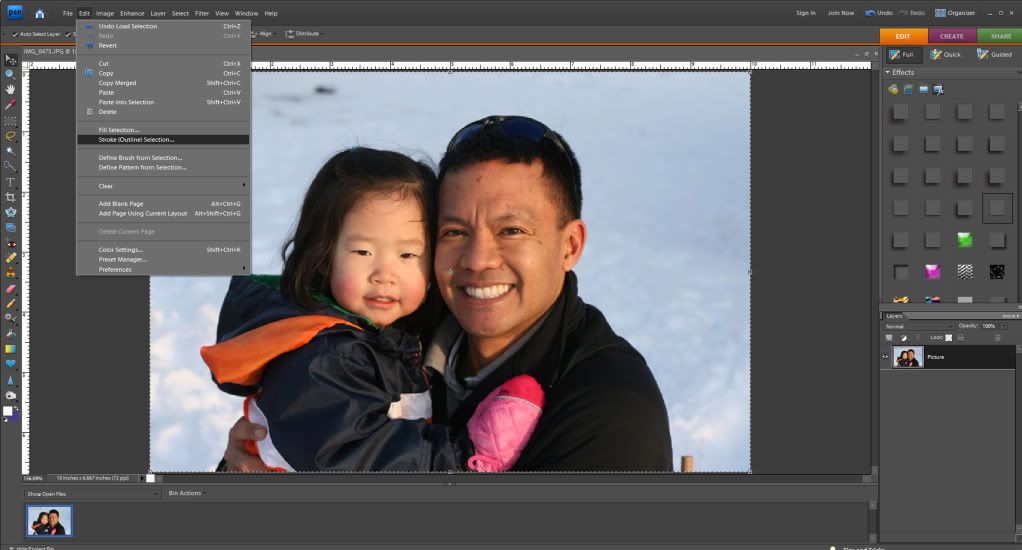
Click on Edit>Stroke (Outline) Selection
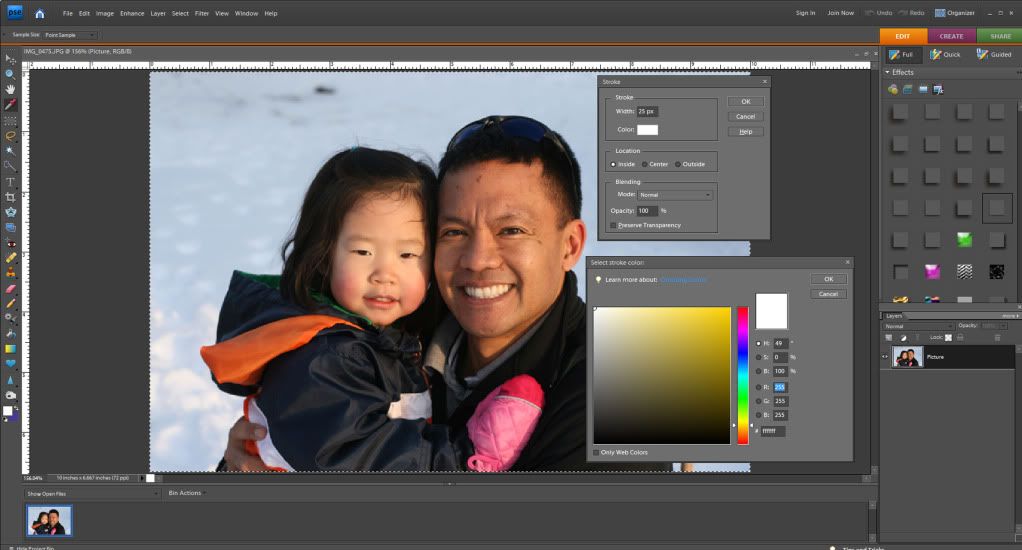
Once you do this your Stroke dialogue box will pop open. The width box controls
how wide your border will appear on your photo or element. (When adding a border to
a photo I usually use about a 25 px setting. If I am adding a border to an alpha or
element I may make it smaller.) If you click on the color box a window opens
that will allow you to select the color of border you want to use. For photos, I like white or
off white however for elements or alphas you may want to use a color matched to the kit.
I leave my Location checked as "Inside", keep the Blending Mode at Normal and leave the
Opacity at 100. Once this step is complete click "ok" to close the stroke dialogue box.
Upon clicking "ok" you should now see a border around your photo.
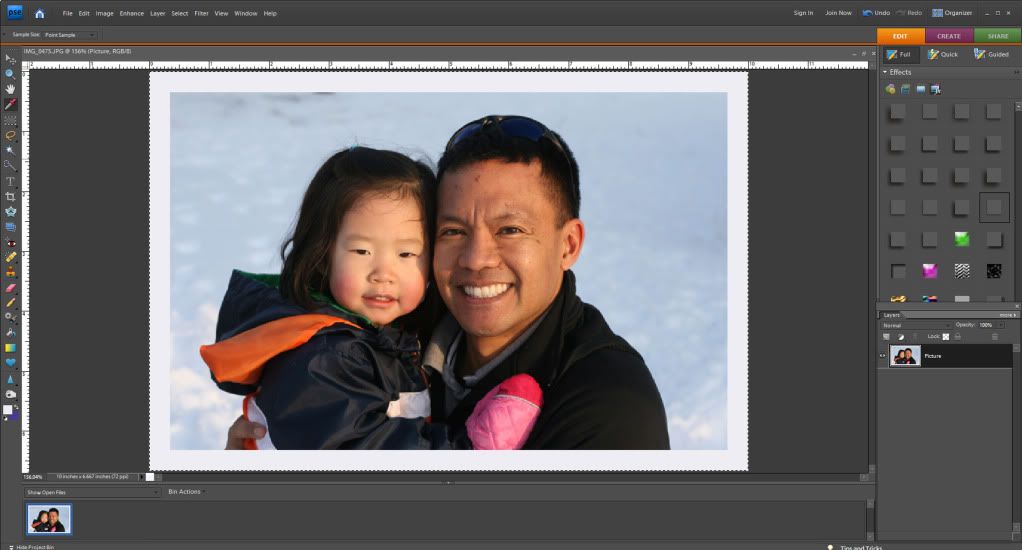
You may notice you still have the "marching ants" around your photo. To remove those
click Ctrl+D.

Hope you found this tutorial easy and informative. Happy Scrapping!!


0 comments:
Post a Comment