Monday, January 31, 2011

Big News and a Big Sale!!!

Attention...Attention!!!


That's right...I'm MOVING!!! While I've LOVED every second of my time at The Digichick, it's time for me to move on, and that means a HUGE sale for you!!! Many of my favorite products won't be going with me to my new digi home, so you can grab them now at their very lowest prices ever. This is your last chance to get these goodies, because once they're gone, they won't be back!

The following products are retiring and are at least 60% off right now in my store:
Acrylic Love Vol. 1
Deck The Halls
Endless Summer Days
Funkalicious Fall
I've Got a Feeling
In My Life
My Little Garden
My Little Garden Quick Pages
Rough and Tumble Quick Pages
School Days
Scraps To Go Volume 9: Laura Rocks
Shiny Happy Alpha: Black Flair
Shiny Happy Grungy Alpha
Silly Stripes Alpha
Splendiferious
Stripey Colors Alpha
Such A Hoot
Sweetikins
Take Me Away
Toothless
Warm Winter Wishes
Whisper of Spring
Whisper of Spring/Easter Sunrise Bundle
Won't You Tell Me Your Name
You Mean So Much

Phew! What a list!!! Head over to my store, shop til you drop, and scrap those memories. In the meantime, keep your eyes and ears open because there's lots of fun coming soon!

xoxo
Image and video hosting by TinyPic

Read more...

Monday Meals in Minutes...

It's no secret around my house that I love to cook. I love to experiment with food! I have a bit of a cookbook obsession, so I've got close to a million recipes at my fingertips (not counting the infinite number of recipes on the internet!). So today, I'm bringing you all one of those myriad recipes. Without further ado, I give you Parmesan Roasted Broccoli!! (Yeah yeah yeah, I know it's a side dish, but it's quick and easy and delicious!)

Ingredients

4 to 5 pounds broccoli
4 garlic cloves, peeled and thinly sliced
Good olive oil
1 1/2 teaspoons kosher salt
1/2 teaspoon freshly ground black pepper
2 teaspoons grated lemon zest
2 tablespoons freshly squeezed lemon juice
3 tablespoons pine nuts, toasted
1/3 cup freshly grated Parmesan cheese
2 tablespoons julienned fresh basil leaves (about 12 leaves)

Directions
Preheat the oven to 425 degrees F.

Cut the broccoli florets from the thick stalks, leaving an inch or two of stalk attached to the florets, discarding the rest of the stalks. Cut the larger pieces through the base of the head with a small knife, pulling the florets apart. You should have about 8 cups of florets. Place the broccoli florets on a sheet pan large enough to hold them in a single layer. Toss the garlic on the broccoli and drizzle with 5 tablespoons olive oil. Sprinkle with the salt and pepper. Roast for 20 to 25 minutes, until crisp-tender and the tips of some of the florets are browned.

Remove the broccoli from the oven and immediately toss with 1 1/2 tablespoons olive oil, the lemon zest, lemon juice, pine nuts, Parmesan, and basil. Serve hot.


Seriously...best. broccoli. ever. We have this at least twice a week. It takes mere minutes to put together and it's just so delicious!! Give it a try, I know you'll love it!

Read more...

Saturday, January 29, 2011

Saturday School: Basically Brushes

Hi everyone out in digiland! Happy Saturday! It's Jenn (jk703) here to share a little information with you. Are you too cool for school? (a Pink song, Raise Your Glass!) *giggles*

Now... I am into digital scrapping for just under a year; when I learn about tools or tips in Photoshop, I share them with you! So.... I am going to do a tut about brushes, but I need to learn more and practice!! This is such a fantastic part of Photoshop, that I wanted to share a few tips first... then when I've got the next Saturday, I will post more that I've learned about the Tool itself!

Brushes can make some really cool effects on your pages!  It is an intricate tool, but one that you will love once you learn the basics!  I know I'm starting to LOVE it!  

  • It is a basic painting tool.
  • It uses a traditional painting manner by applying color with strokes. 
  • The Keyboard shortcut is B.
  • The brush tip is the basic way to modify and change your strokes.
Loading a Brush:
  1. Select the Brush tool and click on the brush picker dropdown from the Options bar.
  2. In the brush picker window, look on the right side for a small arrow or double-arrow, click that and the flyout menu will appear.
  3. Select Load Brushes.
  4. In the window that pops up, navigate to the folder where you unzipped the brush files.  I keep mine in a file called:  Brushes.  So original, right?!
  5. Find the brush (you are looking for an .abr file) you put there, click on it, then click the Load button.
  6. That should load the new brush into your brush picker. If you can't find the brushes - look to the bottom.  


Let's Actually USE the brush:

  1. Create a new layer.  Always do this, so what you do can be undone!
  2. Select the brush tool. C
  3. Choose the brush shape you wish to use.
  4. Set your foreground color. Important to do this NOW!  :)
  5. Position the cursor (now the shape of the brush) and click to "stamp" the shape once  or click + drag to make a "stroke" with the brush.
Tips:

  • You can make your brush larger or smaller with the [  and  ] keys.  Yes, brackets.
  • To paint in a straight line, click on your start point, hold the shift key, then click on your end point.  Funny tip..... click, hold the shift and just keep clicking and your straight lines will be connected.  I made the "house" doing this!  LOL!  
  • Try adjusting the opacity or blending modes of your brush layer to create unique backgrounds or watermarks for your layout.
  • Always create your brushwork on a new transparent layer. This will also allow you to play with the blending mode or color of the brushwork easily.


Most Awesome Tip!


  • Scroll through all of the loaded brushes using the arrow keys on your keyboard. Select the Brush Tool and hover your cursor over your layout, you should see the outline of the brush.  Use the right arrow to scroll, and left to scroll back.  When you find the perfect brush, click once on your layout to apply the brush to the layer. 
Brush Display Options (and my thoughts):
  • Text: This will only display the name of the brushes.  I need some visuals personally!
  • Small Thumbnail: This displays shows small thumbnails of the brushes and then brush size just below it. (This is what mine is on for the tut -- you see a little more).
  • Large Thumbnail: This displays shows a larger thumbnail of the brushes as well as the brush size.
  • Small List: This displays the size of the brush followed by the brush name. There is a teeny-small preview.  I can hardly make out much of what I see!
  • Large List: This displays a larger preview, followed by the size of the brush and the brush name.  Easier on the eyes!
  • Stroke Thumbnail: This view displays the thumbnail, with the size of the brush beneath it. To the right, it shows you what the brush will look like when you paint with it (fantastic!)
I hope you enjoyed some information to get you started on Brushes... there is soooo much to learn about them, and this is just the beginning!  Have a great Saturday and don't forget to stop by the Free Photobook posting that Jen has going on!  A FREE photobook = awesome!  

Have a great one, and thanks for stopping in!
Jenn (jk703)

Read more...

Friday, January 28, 2011

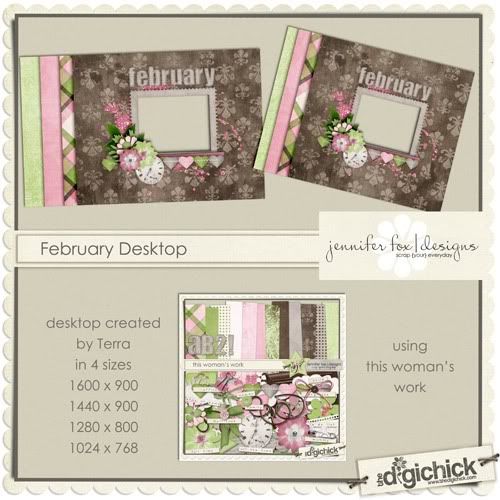
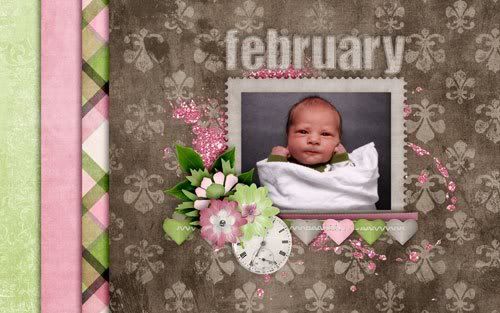
Friday Freebie - February Desktop

Hi everyone! Terra here with your Friday Freebie - a February desktop. I created it with one of Jennifer's older kits - This Woman's Work. If you haven't scrapped with this kit you should really take a look at it. It is such a gorgeous kit.


Read more...

Wednesday, January 26, 2011

Win It Wednesday--Photo Book Edition

Hey everyone! This week, I don't have any new releases coming, but I wanted to do a quick Win It Wednesday post anyway. Earlier this week, I posted a review of a Lulu Photobook and offered it up to one lucky winner. Well, that contest is still going strong and you have plenty of time to enter. Hurry on over to this post and comment--you can get up to 7 entries!!! Good luck!

Read more...

Tuesday, January 25, 2011

Tidbit Tuesday - Cake Balls

When signing up for blog posts, I debated if I would take a Tuesday or a Monday. See, what I wanted to talk about is a recipe, but in no way does it take only minutes. One of my favorite desserts to make is Paula Deen's Cake Balls. Now how many of you have ever hears of this? Well, they are delicious and super easy to make. Here is how. 

1. Bake a cake. Now this can be any cake, but we will talk flavor choices later. Just follow the instructions on the box. 
2. Take the cake out of the oven and let it cool for about 30 minutes. 
3. (If you have a mixer or kids, this next step is easier for you) Mix together 1 tub of frosting with the cake. You will want an even constituency, it will kind of look and feel like cookie dough. 
4. Let the "cake ball batter" freeze for at least three hours, you can leave it overnight. I found it best to place in tupperware. 
5. Scoop them out with a melon baller or small spoon and roll them into more perfect balls.
6. When you finish, stick 'em back in the freezer for about 30 minutes.  (While this is happening, set up a cookie sheet with wax paper on top)
7. Melt some chocolate in whichever way or method is your favorite. (Milk, Semi-Sweet, or White)
8. You can either use a toothpick, or snap the two middle prongs out of a plastic fork and dip the cake balls in the chocolate. Stick 'em on the cookie sheet
9. Stick them back in the freezer for another hour - two hours.
10. ENJOY!

You can also find this recipe here

I love love love cake balls. 

Here are some of my favorite combinations:

Funfetti with Funfetti frosting
Yellow Cake with Chocolate Icing
Strawberry cake with Strawberry Icing
Red Velvet with Cream Cheese frosting
Devil's Food with Cream Cheese frosting

Have any of you tried it before? What are some of your favorite combinations?

Read more...

Monday, January 24, 2011

Lulu Photobook Product Review and Giveaway

Recently I was contacted by some really sweet people at Lulu. They offered me the opportunity to try out one of their photo books, share my review with you all, and even giveaway a free book to one lucky reader! I was so excited to have this opportunity! I love printing my layouts into bound books, love trying new printing companies, and love giving things away, so this was a win-win for me.

From Lulu’s website, you can read this information:
It's easy to create your own photo book online using Lulu Studio, our free online photo book creator. You can choose from a range of sizes, cover types and make use of our free professionally designed templates. Photo books are a great way to save and share your digital photographs instead of ordering photo prints. Convert your digital photo albums into beautiful, high quality printed photo books to keep, sell or share with friends and loved ones. Are you an artist publishing your portfolio photo book? A young parent creating a baby photo book? A newlywed making a wedding photo book? Or perhaps you are just feeling creative? Now you can publish and sell your photo book using our online tools. Lulu print on demand publishing makes it easy and affordable to publish and sell your custom photo book. Want to get it done quickly and easily? Lulu Studio makes it easy to use your pictures from Flickr, Facebook, Photobucket, SmugMug, or just upload them from your computer. Our photo books use a custom print on demand process and ship within 3 days of receiving your order. Buy in larger quantities to save money on each book you order.

Options and pricing: They have so many sizes of books to choose from. I love the “wallet books” that are 3.75” x 2.5.” How cute!!! They go all the way up to 13” x 11,” too. They have several sizes perfect for digital scrappers: 8.5”x8.5” (my favorite size) and 12”x12” square are perfect. A 12”x12” book with 20 pages starts at $49.95. A 8.5”x8.5” book with 20 pages starts at $19.99.


The Creation Process: Lulu Studio makes creating your book simple. You choose your book theme, add images, and off you go. You choose the layout you want for each page (for scrapbook layouts, I chose a full page), and then drag in your uploaded images. You’ll notice a dotted line marking the cut-off for each page. That’s very important and you’ll want to make sure that you don’t have anything important (photos, journaling, elements) in that area or it WILL BE CUT OFF in your final book. Even though I kind of knew that as I was creating my book, I didn’t want to resize to fit for each page and I did lose some detail in some of my pages. Leaving about ¼” from the outside edges is a pretty good rule of thumb. I could not find an option for creating a custom spine or title page, but neither of these was a big deal for me.

Book Quality: I love the cover of this book. It’s not shiny like most of my photo books. Instead, it’s a pretty matte with just a touch of sheen. I love that it’s different and it really is pretty. I was able to just use a layout for my cover (again, remember not to have anything important around the edges!), and it worked out just fine. The binding is nice and seems sturdy. The pages don’t lay flat when open, but that’s no different than my other photo books. It would just keep me from printing double page spreads very often. The print quality is very good. It is much better than Artscow and about even with Shutterfly. The pages are thick and the colors are great. No over saturation or dullness. The pages are vivid and pretty true to what I see on my monitor.


All in all, I’m very impressed with Lulu. Their customer service was top notch. Emails were answered in a timely fashion. Shipping was quick and packaging was great. If you are looking for a new photo book publisher, give Lulu a shot. I think you’ll be pleased.


Now, here’s the best part. Lulu has given me one 8.5”x8.5” photo book to GIVE AWAY to a lucky reader. How fabulous is that? If you’d like a chance to win, leave a comment here telling me what your book would include.


Would you like an extra chance (or chances!) to win? Simply do one or more of the following and be sure to leave each entry in a separate comment for more chances.


1. Follow this blog.
2. Become a fan of Jennifer Fox Designs on Facebook.
3. Subscribe to my newsletter.
4. Follow jfoxdesigns on Twitter.
5. Post about this giveaway on your Facebook page.
6. Tweet about this giveaway on Twitter.

You can get up to 7 entries to win this fabulous photo book!!! How fun! This giveaway will close at MIDNIGHT EST on JANUARY 31st. Be sure to check back then to see if you've won. Good luck!
Image and video hosting by TinyPic

Read more...

Monday's Meals in Minutes: Meatball Mania!

Meatballs!  Besides calling my kids that, I love to eat them!  I hope you do too - cause that is my meal to share today!  Hello to everyone out there, this is Jenn (jk703) here to share an easy family favorite!

Crock Pot Meatballs!

You will need (the winded version):
Frozen Meatballs!  I choose to use Turkey meatballs...and I made 96 meatballs. 
Red Spagetti Sauce - homemade sauce or bottled sauce will do! 
Diced Veggies -  approx. 2-3 cups - onions, mushrooms, squash, zucchini, green pepper, carrots, or any others that you might like. 
McCormack Grinders Italian Seasoning
Optional:  Cheese, Garlic (Powder, Salt, or even Fresh... add if you like)


1. Plop the meatballs in your crock pot....set to Low Temperature. I have a 96 piece bag!
2. Add either your own sauce or any other sauce you like, approx. 32-48 oz.  I tend to use about half of the number of meatballs! For today, since I have 96 meatballs, I used approx. 48 oz. of sauce. Here is a pic as I am adding the sauce in... Turkey Meatballs are sooo yummy!

3. Add the diced veggies.  I've added onion, green pepper, mushrooms - they are very small because I try to hide them from my kids!  LOL!
4. Stir it all together; coat meatballs and veggies well. 
5. Sprinkle some garlic salt or garlic powder, or even a fresh clove of garlic. 
6. Grind the McCormack Grinders Italian Seasonings.  I used about a 1/2 tsp for my large amount. Stir. 


Cook for  4-6 hours on low. Remember to check your meatballs at 4, 5, and 6 hours depending on your crock pot and temperature settings.  Here are mine after a good stir and 6 hours of cooking... 
Now at the end... you have some choices for your dinner. You could boil some pasta and serve the meatballs over.  Just toss the cooked pasta in with the meatballs and serve... OR you could do what we did and make mini Meatball Hoagies!  My boys love them, and they are yummy!  Sprinkle the cheese goodies on top if you like... We didn't tonight, but it is my fav topping!


This big batch is perfect for lunch later in the week or a second meal one night! Easily freezes too!  Hope you've enjoyed it!  


Thanks for visiting!  If you have any recipes that you are looking for a fast version for, let me know -- I love a good challenge!  Have a great Monday!
Jenn
(jk703)

Read more...

Sunday, January 23, 2011

Scissors Sunday - You Are a Star

Hi all, Sarah here today and I wanted to share with you the steps I take when making a hybrid card. Cards are both easy and useful so I make a lot of them and I'm hoping that if you've been putting off doing hybrid this blog post helps convince you that making cards is both easy and fun.

First I want to mention that I almost always start with a card sketch. I have a few go to sites for these and one of my favorites is PageMaps. I know a lot of you are probably familiar with this site because there are some totally fun layout sketches to be had there but in addition to these there are other sketch formats including cards and tags (both of these are totally fun for a hybrid artist). Check out the PageMaps archives for printable PDFs of these awesome sketches. For the card I made today I chose a sketch from the December 2007 CardMaps.

For this card I'm using Jennifer's fun new collab with Nikki Epperson: A Boy Named Trouble.


Once I pick my sketch and the kit I want to work with I then open up my scrapping software and create a 8.5"x11" canvas. I almost always make my cards 4.25"x5.5" (this is an 8.5"x11" sheet of cardstock cut in half width wise and then folded in half width wise). I like working with this size because you can get two cards out of a sheet of cardstock with no waste and they fit nicely in an A2 envelope (often known as invitation envelopes).

I start by cropping my background paper to 4"x5.25". If you decide to do a different sized card a good rule of thumb is to crop your background paper to .25" less both length wise and width wise to your card which will give you a nice even 1/8" border all the way around your paper. Next I layer the other papers and embellishments I would like on the card to make sure it all fits together nicely and the colors work together. Last I add a sentiment. In this case I just used my text tool and typed it in but you can also use alphas, word strips or wordart to add your sentiment. For those that are curious the font I used is His Name is Honey available at kevinandamanda.com which is a great resource for both decorative fonts and handwritten fonts.


After I'm happy with the way my card looks, I then move the items around so that they all fit nicely onto my canvas with no overlapping. Tip: Sometimes you have to rotate items to fit, like I did with the scalloped border.


Once I've done this I then print my card elements on matte presentation paper. I always wait until I print before choosing my cardstock so that I can make sure my cardstock color works well with my printed papers.


Once I've printed I start by cutting out what I can with my paper trimmer.


And then cut the remaining elements out with my scissors. For those of you that are afraid of scissors (and I know you are out there) my cuts are never perfect. In my opinion it's just part of what gives a homemade card it's charm.


Once all my papers and embellishments are cut out I then adhere everything to my card front (for this example I just used photo splits) and voila I have a cute card to send out to someone who needs to be reminded that they are indeed a star!

Read more...

Saturday, January 22, 2011

Saturday School - Inspiring Title Work

Happy weekend everyone, this is Terra with today's Saturday School post. One of the areas I have been struggling in recently is creating good title work for my layouts. I often leave the title work until the very end when working on a layout because I find it one of the most time consuming aspects of any page. The title work can definitely make or break a page and I have spent the past week looking for new inspiration.


One of the obvious sources of inspiration is to browse through various digiscrap galleries to learn from some of the best. While I was browsing through Jennifer's gallery at The Digi Chick I came across some really amazing title work. Look what I found!

Layout by SmallMoments with Crabby Kid by Jennifer Fox Designs and Simply Scraps; Scraps to Go Template #11: 2-Pager by Jennifer Fox Designs

Layout by KateD with Raining on Sunday by Jennifer Fox Designs; Scraps to Go vol. 5 - Layer Happy by Jennifer Fox Designs

Layout by HeatherGW with Splendiferious by Jennifer Fox Designs and Jenn Barrette; Crafts with Scissors Alpha: Neutrals by Darcy Baldwin

Another place I like to look for title work is magazines as they contain so much inspiration. Not only are the article titles inspiring, but advertisements contain a wealth of inspiration as well. I love to look at all of the different font combinations on the pages and pay special attention to the pages that jump out at me the most.

A recent source of inspiration is Pinterest. I could easily get lost for hours browsing this site where users can post collections of things that they love and follow collections created by others from around the world. It is full of amazing inspiration. These are some of the images that are inspiring my title work.


Before I go I want to let you know about an amazing charity collaboration, Brighter Days Ahead, available now at Sweet Shoppe Designs. All proceeds go to Zoe Pearn, one of SSD's amazing designers who lost her home in the Queensland floods. Jennifer was a contributor to this gorgeous collab and it is definitely a must have.


- Terra

Read more...

1/21 Freebie!

Hi!!  NikkiM here to bring you your freebie for this week.  I know I am a day late but I guess it's better late than never right??  So here ya go... I made you a cluster frame using Jennifer Fox's and Nikki Epperson's
new collab A Girl Named Trouble!

I hope you like it!!

Read more...

Thursday, January 20, 2011

Lots of new goodies and some winners!!!!


Hey all! Jennifer teamed up again with the wonderful Nikki Epperson in A Boy Named Trouble which is perfect for all of those photos of your little monsters, I mean sweet little boys (hehehe). There's also a gorgeous new bloggie package to freshen up your blog. So, without further ado....


Did you miss out on A Girl Named Trouble last week? Well, this week you can get both Boy and Girl Trouble in one sweet bundle. When you buy the bundle, you save nearly 25%!!!


There's also a gorgeous new addition to the Pretty Bloggie collection from CT chick Leah (girlygirl) called Memory 365! If you're doing Project 365 or Project 52, this blog set is a must have!


REMEMBER, THESE ITEMS ARE 20% OFF THROUGH FRIDAY ONLY!!!

How about some winners???

Congrats HEATHER AND ANGIE!!! You've each won a copy of A Boy Named Trouble!!! Please PM Jennifer at The Digichick for your coupon code. Congrats!!!
Have a wonderful week, everyone! Happy shopping and happy scrapping!

Read more...

Wednesday, January 19, 2011

Sneak Peek and Win It Wednesday


Nikki and I would love to give away a copy or 2 of our newest kit. We're going to make it super simple for you. Simply comment below and tell us how the weather is in you part of the world and you'll have one entry to win!
If you'd like an extra chance (or chances!) to win, do one or more of the following. Leave each entry in a separate comment for more chances!

1. Follow this blog and/or Nikki's blog.
2. Become a fan of Jennifer Fox Designs on Facebook and Nikki Epperson Designs on Facebook.
3. Subscribe to my newsletter.
4. Follow jfoxdesigns on Twitter.
5. Follow nikkiepperson on Twitter.
6. Tweet about this giveaway on Twitter.

Phew! You can get up to 7 entries to win!!! How fun! We'll be here to pick winners around midnight EST, so hurry! Have a wonderful Wednesday!!!

Read more...

Tuesday, January 18, 2011

Tidbit Tuesday: The Daily Digi

One of my favorite sites in the digi-world is The Daily Digi.


This site is full of so much amazing information for scrappers and hybrid artists. They have tutorials, non-digi fun stuff, a hybrid section, and featured designers. I can seriously spend hours and hours looking at this site and I always find something new.

Their popular Funtastic Friday posts tell about all sorts of fabulous deals, announcements, and more from some of your favorite designers. Their section for beginners is amazing, too! I can't leave out the Digi Files. From their site: "THE DIGI FILES is a collection of products by our sponsors for the month. Some of these designers you might know and love, others might be new to you, but what a GREAT way to try them out and test drive their products with such a low risk to you. It might also be fun to stretch yourself as a scrapper and see what you can do with a designer’s products you aren’t used to working with." This is one of the best deals out there and I urge you to try it out. I'm even a past featured designer!!!

One last little fact...and this one's super cool. The Daily Digi even has it's own app!!! I have this on my iPhone and adore it...best of all??? It's FREE!!!

So, on this dreary (at least here) Tuesday evening, head on over to The Daily Digi and take a look around. I just know you'll love it!

xoxo

Jennifer

Read more...

Monday, January 17, 2011

Easy Tortilla Soup

Hello everybody, Amber here with a YUMMY recipe for Tortilla Soup! My family just LOVES when I make this and its great to eat on a cold winter's night!

Tortilla Soup

Ingredients:
2 cans chicken broth
2 cans Rotel
2 cans water (fill the chicken broth cans with water)
3-4 cooked chicken breasts
1 can rinsed black beans (my family doesn't like black beans so I leave this out)
1 cup frozen corn
1 tsp. cumin
1 clove garlic- pressed
1/2 medium onion- chopped

Cut chicken breasts into small pieces. Put everything into a large pot and simmer for 30 mins.

Serve with shredded cheese, crushed tortilla chips, and guacamole.

Read more...

Sunday, January 16, 2011

Scissors Sunday: Hybrid Inspiration

Hi everyone!  Jackie here with today's Scissors Sunday for you.  The moment I saw the latest collab from Jennifer - A Girl Named Trouble - I just knew I had to do something with pink in it!  Off to the craft store I went in search of the perfect little embellishments to use and I came upon some adorable pins:


I have never used pins before on my hybrid projects, but I have seen others do it and I have even bookmarked a few projects that I love.  When I got home, I looked through those projects and decided to lift this card by tiffguam at Splitcoaststampers:


Here is what I came up with:


I hope you enjoyed seeing how I went about making my card with Jennifer's new kit.  Be sure to share yours in her gallery over at The Digichick - we'd all love to see!

Read more...

Saturday, January 15, 2011

Saturday School - Journaling

Happy Saturday, everyone! Terra here with a subject that is close to my heart: journaling. I love to write, but sometimes I have to remind myself how important it is for me to write. I don't write often enough because I let my own fears get in the way. So this year I have decided to try to make personal writing a priority and one of the easiest ways to do that is to focus on journaling on my scrapbooking pages.

The following is a list I put together to help when suffering from writer's block:
  1. Start writing - One of the most important tips that I have found is to simply start writing. You can't write anything without starting. If you find that you are hampered by distractions on the computer, pull out a notebook and write on paper. Whatever you choose, don't let getting started stop you from writing at all.
  2. Don't think about the end result and don't try to be perfect - I am always guilty of this one. I always worry too much about the end result before I have even begun and want to make sure it is perfect the first time. But that is what editing is for. The best writers never end up publishing their first draft.
  3. Write from your heart - Don't censor your writing. Write as if you are writing to your sister or a very close friend. The friendly tone is enjoyable to read and even easier to write.
  4. Use a prompt - There are some great scrapbooking prompts on the Internet and in books. Choose one and start from there.
  5. Write to someone - Make your story personal and write to someone. I choose to write to my son on many of my layouts so that he can read them when he gets older.
  6. Use lists - If all else fails, use a list to convey your message. Some of my favorite layouts in the galleries are ones with journaled lists.
  7. Tell a story - Everyone has a story to tell. Write yours down for future generations to read.
  8. Have fun and don't stress - This is easier said than done, but writing should be enjoyable and should relieve stress - not cause it!
Have fun journaling!

Are you interested in a specific topic for an upcoming Saturday School post? Let us know in the comments.

Read more...

Thursday, January 13, 2011

Awesome New Collab...and some winners!

Why yes! Jennifer has another awesome collab this week. And this time it's with another of my very favorite people, the very talented Nikki Epperson! These two ladies have gotten together to give you the perfect kit for scrapping those crabby, cranky, fit throwing, "Calgon take me away" moments of every day life. It's 20% off today ONLY at The DigiChick,so head on over there now and grab it!


Jen's CT had a lot of fun working with this kit, check out a bit of what they did with it!


And now, how about some winners? We LOVED reading about your cranky moments, and with the help of random.org I've chosen THREE winners.


Butterfly Dreamer


Chrystyna


Windgefluester

Congrats winners! Please PM Jennifer over at The DigiChick to receive your prize!
That's all for this week, Have a wonderful weekend!

Read more...
Related Posts with Thumbnails

Disclaimer

As a creative team member for several digital scrapbook designers, I have received their products for free in return for creating and posting projects (digital layouts, hybrids projects, etc). Many of the layouts you see here were done in conjunction with requirements for these creative teams. Please be advised that the products used were indeed received for free.
The Daily Scrapper - Topsites Best Scrapbooking Sites, Digital Scrapbooking, Scrapbook Supplies, Reviews, Awards
List of the Best Digital Scrapbooking Websites by Scrapbook MAX!SCRAPBOOKING TOP 500 The Daily Scrapper - Topsites Free Digital Scrapbooking

  © Blogger templates Newspaper III by Ourblogtemplates.com 2008

Back to TOP