Shaped Card
Hi everyone! Happy Wednesday to you all! Jackie here enjoying some chocolate pudding as today (July 7th) is Chocolate Day. Did you know that? Go grab a candy bar, some chocolate milk, or if you're like me and on a diet, the chocolate pudding! Want another way to celebrate Chocolate Day? Create something fun with some of Jennifer's goodies, of course!
I'm going to show you a fairly detailed tutorial today. If you already know how to do most of this, then feel free to proceed on with other steps. If you want to learn step by step how I make this, then this is the tutorial for you! Beginners with hybrid and PSE or other photo-editing software look no further!
I'm going to show you how to make a fun shaped card with Jennifer's collaboration with Shawna Clingerman - Sweetiekins.
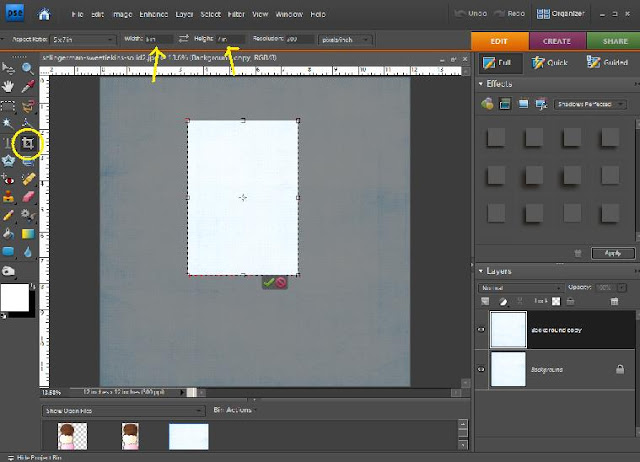
First off, I opened up the elements and papers I wanted to use in PSE 7. I knew that I wanted my card to be 5x7 in size so I used the crop tool and changed the width and height.

Then I created a 5x7 work area (the size my finished card will be).
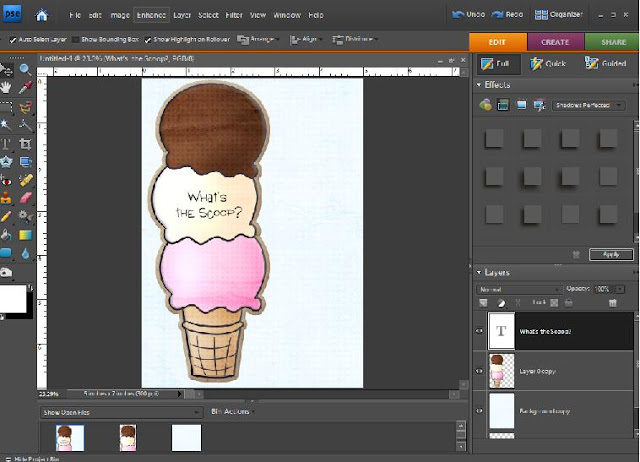
Next, I placed the paper and element on the 5x7 work area and laid it how I wanted it to be.
Then I decided to add a greeting that played along with the ice cream theme. Clever, huh?

The next step was to create the 8.5x11 work area that would be printed off.
I then gathered my supplies.
I cut out the paper and the ice cream cone and laid it out on the card base and tried to figure out where I liked it best.
Then I added the adhesive to the back (left side when it's right-side up) side of the paper the ice cream cone would sit on and placed it on the card base.
Then I adhered the ice cream cone and cut along the right edge to shape the card. The next thing I did was add the glitter. I used Stickles - it's a very easy way to add some shimmer things!
And voila - the finished product! A card that's not your typical card - it's got some shape to the front of it - but very easy to make.


2 comments:
Just a quick note to let you know that a link to this post will be placed on CraftCrave today [07 Jul 12:00pm GMT]. Thanks, Maria
That is super cute!! I love the cut out shape.
Post a Comment