Tuesday, March 8, 2011

Tidbit Tuesday - Recipe for Key Lime Pie

I'm starting to plan my menu for St. Patrick's Day next week and was trying to think of a green dessert. I remembered seeing a Key Lime Pie recipe on Oprah a couple years ago so I decided to look it up and was happy to find the recipe on her website. So in case you are starting to think of what to eat on St. Patrick's Day, I thought I would share the recipe for Mar-a-Lago Key Lime Pie with you today.
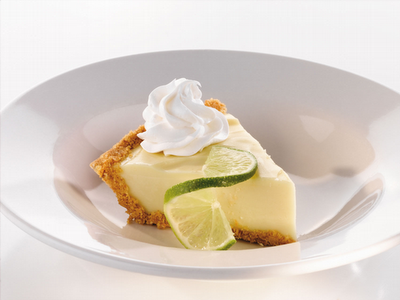
Mar-a-Lago Key Lime Pie

Servings: Serves 8

Ingredients
  • 3/4 pound graham crackers
  • 4 Tbsp. granulated sugar
  • 2 sticks melted butter
  • 1/4 tsp. sea salt
  • 4 egg yolks
  • 1 can (14 ounces) condensed milk
  • 2/3 cup fresh Key lime juice
  • 1 lime , grated zest
  • 1 cup heavy or whipping cream , chilled
  • 2 Tbsp. confectioners' sugar
  • 1/2 tsp. vanilla extract

Directions

To make graham cracker crust: Preheat the oven to 325°.

Break up the graham crackers, place in a food processor and process to crumbs. Add the melted butter, sugar and salt and pulse until combined. Press the mixture into the bottom of a 9-inch pie pan, forming an even layer on the bottom, sides and edge. Bake the crust for 10 minutes. Remove from the oven and allow the crust to cool.

To make filling: While the crust is resting, in an electric mixer with the wire whisk attachment, whip the egg yolks and lime zest at high speed until fluffy, or 5 to 6 minutes. Gradually add the condensed milk and continue to whip until thick, 3 to 4 minutes longer. Lower the mixer speed and slowly add the lime juice until incorporated.

Pour the mixture into the crust and bake for 15 minutes, or until the filling has just set. Cool on a wire rack, and then refrigerate for 20 minutes.

To make topping: Whip the cream, confectioners' sugar and vanilla until nearly stiff. Evenly spread the whipped cream on top of the pie, and place in the freezer for 20 minutes prior to serving.

Read more...

Spring Cleaning and More

Recently, with the warmer weather, I've been really dying to reorganize, redecorate, and just refresh my home. It's not quite warm enough for planting flowers and my garden, so I'm really focusing on inside my house. For a while now, we've been thinking of redoing our entire TV/entertainment center thingie, and I've been spending ages checking out new LCD TV Stands. It's so much fun to browse through this shop and check out new ideas for sprucing up my living room! If you're doing some refreshing at home, tell me about it! And if you have any cool ideas for TV/entertainment areas, let me know!

Read more...

Monday, March 7, 2011

Monday Meals in Minutes

Hey Scrappers! Lori here with your Monday Meals in Minutes. I don't know about you, but Monday's at our house are simply crazy! So I need a meal that I can get on the table fast, but that I don't have to baby sit too much either.


Today I am going to share with you one of our favorites...

Spaghetti Pie

Ingredients:

  • 6 ounces spaghetti
  • 2 tablespoons margarine
  • 1/3 cup grated parmesan cheese
  • 2 eggs (well beaten)
  • 1 cup cottage cheese (I use fat free)
  • 1 lb lean ground beef
  • 1/2 cup chopped onion
  • 1/4 cup green pepper (optional, chopped)
  • 1 (8 ounce) can diced tomatoes
  • 6 ounces tomato paste
  • 1 teaspoon sugar
  • 1 teaspoon oregano
  • 1 teaspoon tarragon
  • 1/2 teaspoon garlic
  • 1/2 cup mozzarella cheese

  • Instructions:

  • Preheat oven to 350 Degrees
  • Cook spaghetti as directed on package
  • While spaghetti is cooking, brown the ground beef, add onion, green peppers. Drain any excess fat
  • Add diced tomatoes, tomato paste, sugar, oregano and garlic
  • When spaghetti is done, drain and add margarine, parmesean cheese and eggs
  • Mix well
  • Spray a 9x13 pan with non stick spray and then line the pan with the spaghetti mixture
  • Spread cottage cheese over spaghetti
  • Spread meat sauce over spaghetti and cottage cheese
  • Bake in oven at 350 for 20 minutes. Add mozzarella cheese and bake 5 more minutes.
  • Serve with garlic bread, and salad.
  • Makes 6-8 servings.
  • Enjoy!!
  • Read more...

    Sunday, March 6, 2011

    Hybrid Highlight~

    Angie here bringing you a little hybrid goodness this week! I was trying to think of what I could do and decided on making a cute little bookmark. Since I retired, I have gone back to reading more, but I have been using a business card as my bookmark. So I decided to use Jennifer's Memory Keeper kit because I loved the colors and figured it would be perfect for a bookmark. I made it 2x6 inches and it turned out to be the perfect size. So if you are looking for a little teacher gift gift or jut something to say "hi" this is a great way to do it!


    Read more...

    Saturday, March 5, 2011

    Saturday School - Adding a Border to Photos

    Adding a Border to Photos or Elements in PSE

    Hey Everyone!!  Michelle (aka mdel) here with a tutorial for y'all.
    Have you ever wanted to add a border to a photo or element to help
    give it a little pop?  From time to time I find myself adding an
    alpha to one of my layouts only to notice that it is getting
    a bit lost on the page.  Today I thought I'd share an easy tutorial for adding a border
    around a photo, element or alpha.
    Let's get started...

    To begin, open Photoshop Elements and a photo.  I currently use PSE 7.0 but I have used
    this technique in PSE 5.0 as well.  Make sure your layers palette is visible.  If the
    palette is not visible go to Window>Layers which will open the layers palette.

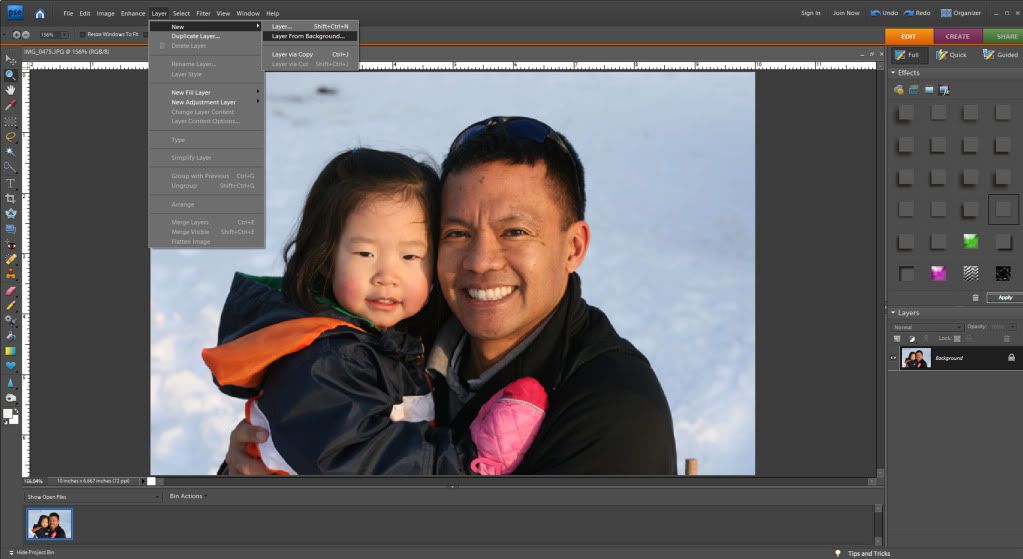
    Next click on Layer>New>Layer from Background.


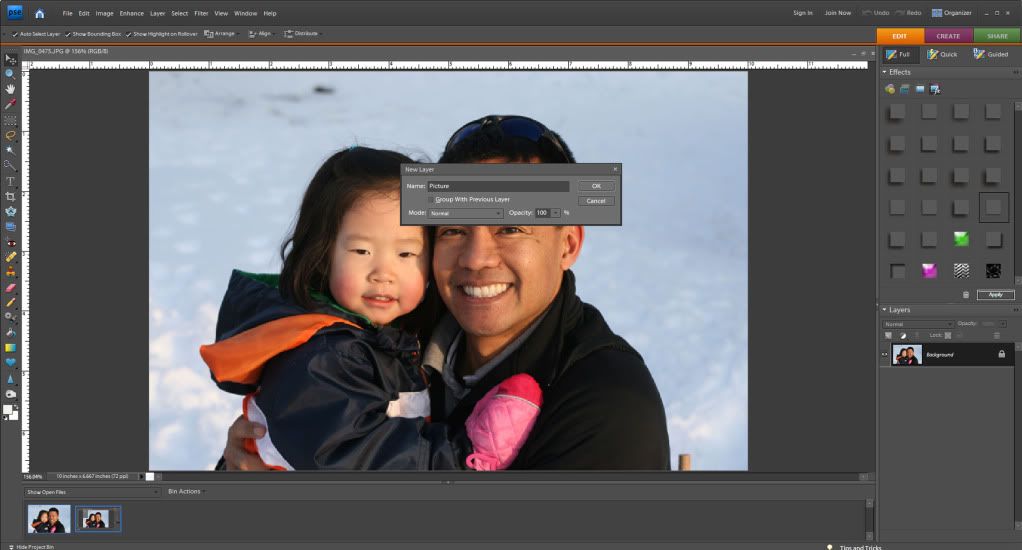
    You can now give your photo layer a name (doesn't really matter what you choose)
    and then click "ok" to close the dialogue box.


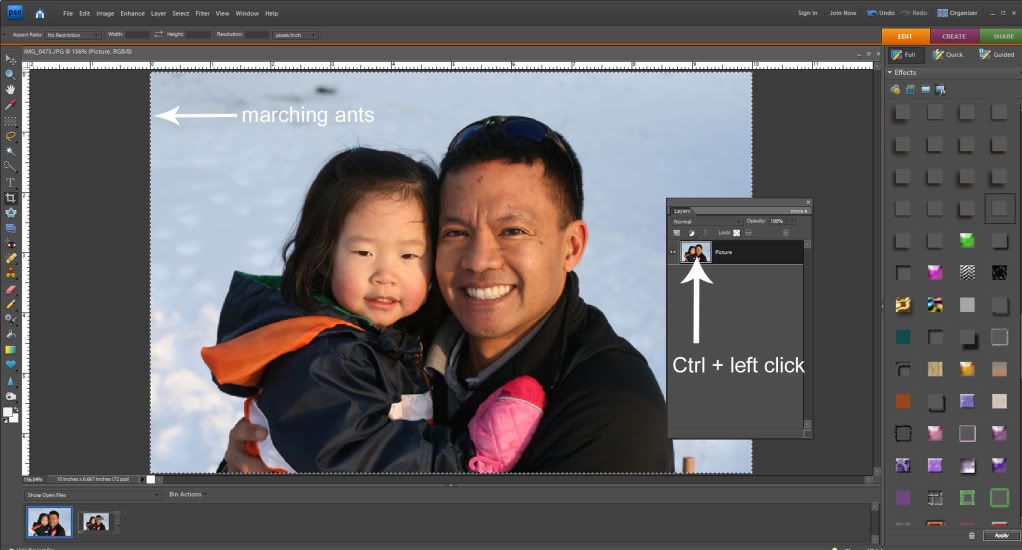
    Hold down the Control (Ctrl) key and left click your mouse on the photo
    layer icon in your layers palette.  This will bring up what are referred to
    as "marching ants" around the edge of your photo.


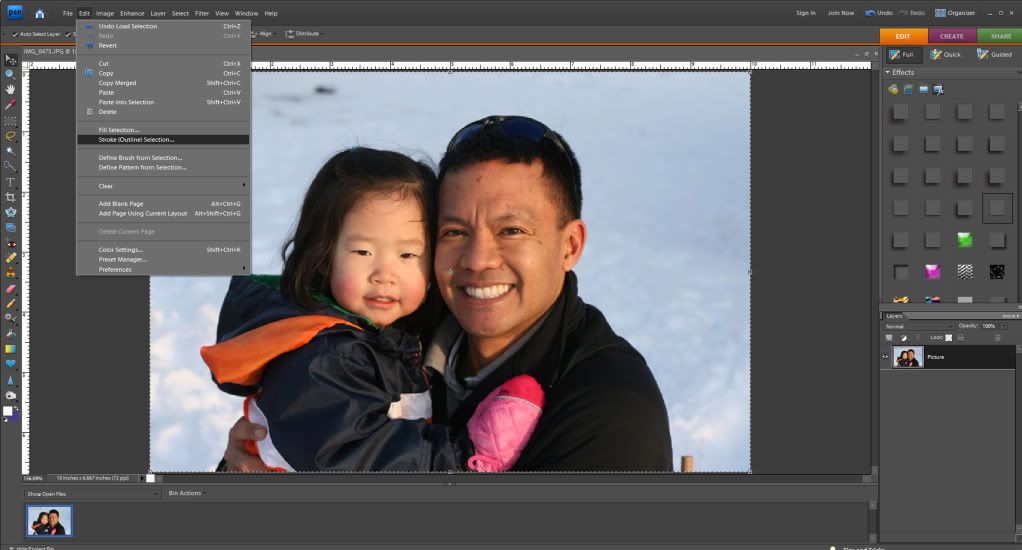
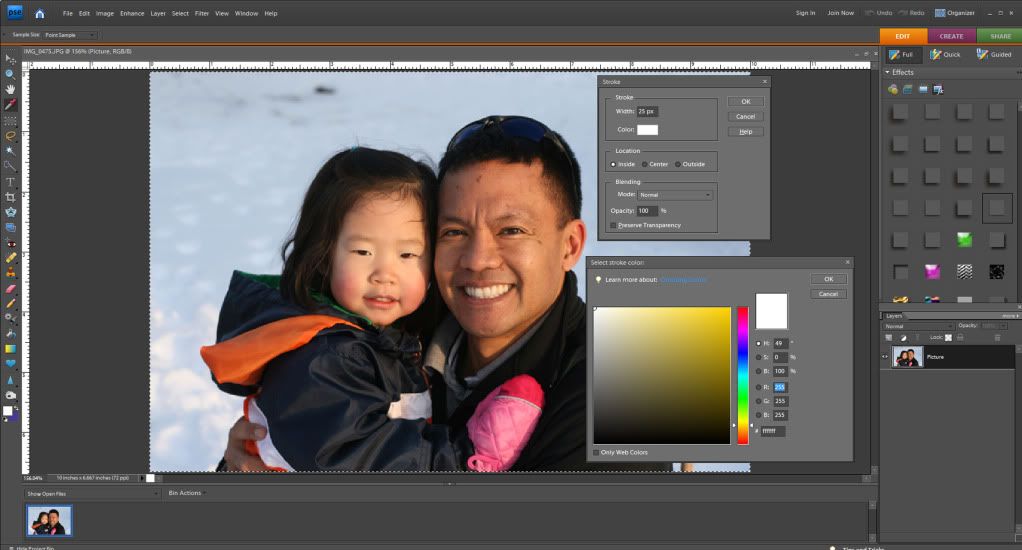
    Click on Edit>Stroke (Outline) Selection


    Once you do this your Stroke dialogue box will pop open. The width box controls
    how wide your border will appear on your photo or element.  (When adding a border to
    a photo I usually use about a 25 px setting. If I am adding a border to an alpha or
    element I may make it smaller.)  If you click on the color box a window opens
    that will allow you to select the color of border you want to use. For photos, I like white or
    off white however for elements or alphas you may want to use a color matched to the kit.
    I leave my Location checked as "Inside", keep the Blending Mode at Normal and leave the
    Opacity at 100. Once this step is complete click "ok" to close the stroke dialogue box.


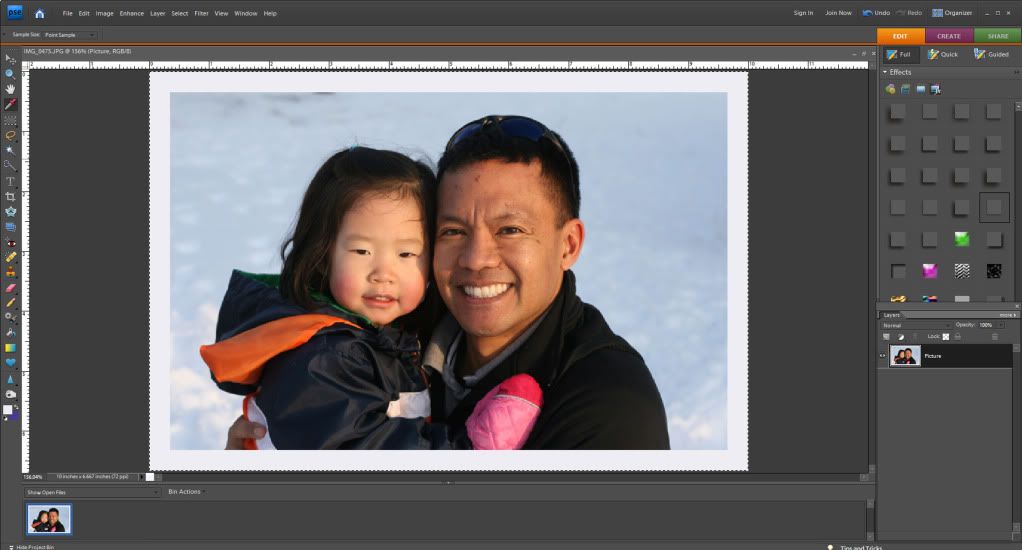
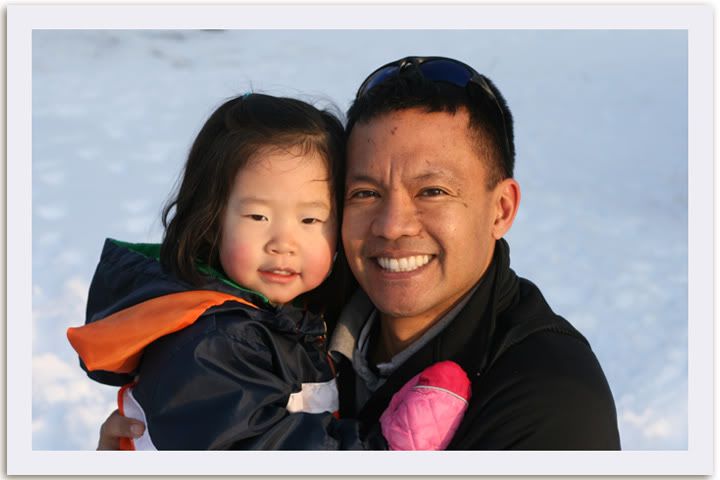
    Upon clicking "ok" you should now see a border around your photo.


    You may notice you still have the "marching ants" around your photo.  To remove those
    click Ctrl+D.


    Hope you found this tutorial easy and informative.  Happy Scrapping!!

    Read more...
    Related Posts with Thumbnails

    Disclaimer

    As a creative team member for several digital scrapbook designers, I have received their products for free in return for creating and posting projects (digital layouts, hybrids projects, etc). Many of the layouts you see here were done in conjunction with requirements for these creative teams. Please be advised that the products used were indeed received for free.
    The Daily Scrapper - Topsites Best Scrapbooking Sites, Digital Scrapbooking, Scrapbook Supplies, Reviews, Awards
    List of the Best Digital Scrapbooking Websites by Scrapbook MAX!SCRAPBOOKING TOP 500 The Daily Scrapper - Topsites Free Digital Scrapbooking

      © Blogger templates Newspaper III by Ourblogtemplates.com 2008

    Back to TOP