Monday, February 14, 2011

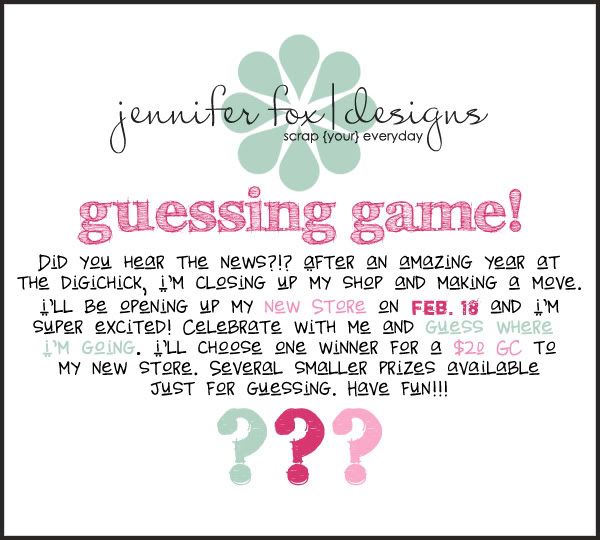
**CLOSED** Where Am I Going??? Guessing Game Time!!!

Simply post your guess as a comment here and you could win! You MAY guess multiple times, with a 5 guess max. Can't wait to read your replies. Good luck!

Read more...

Valentine's Day Meals in Minutes

Happy Valentine's Day everyone! This is Lori bringing you today's meals in minutes!!

In honor of Valentine's Day, I thought I would share one of my favorite recipes and a story about why it is one of my favorites...

On my third date with my husband, we decided that I would come over to his house, and I would cook a meal for us. When I arrived, I discovered that he totally lived the bachelor life (translation NOTHING to cook with) So we went to the store, and he bought everything I would need to make my recipe. (Pots, pans, knives, measuring cups and spoons; you get the idea) It was then that I started thinking that I could see myself with a guy like that... He was willing to do anything for us to have a nice date! So we went back to his house and I made the following recipe. He said he really liked it, but it wasn't until about a year later that I found out that he had decided that night that he HAD to marry me, because he loved my cooking! Silly story, but true!

What follows is the recipe for simply THE BEST Chicken Marsala EVER! It is super easy, ready in about a half an hour and makes you look like a rock star!

Now the recipe I have calls for you to use chicken breast halves and to pound them out thin for more even cooking. For my family (we have a 4 year old) cutting the chicken into bite sized pieces before cooking shortens the cooking time, stretches the recipe a bit to serve more if necessary and just makes the whole process easier during serving. But... if using cut up chicken offends your sensibilities, then go ahead and use the whole breasts, the rest of the recipe is the same. :-)

Here is what you will need:

  • 4 Tbsp. unsalted butter
  • 4 boneless skinless chicken breast halves, cut into bite sized pieces of uniform size for even cooking
  • 4 shallots (If you don't have shallots, you can use 1 small yellow onion and 2 cloves of garlic both minced fine), minced fine
  • 1 lb mushroom, sliced (I prefer Portabella, but use whatever mushrooms you like)
  • 4 thin slices of prosciutto, chopped small
  • 1/2 C. dry Marsala
  • 3/4 C. heavy cream (DO NOT skimp on this it MAKES the sauce so YUMMY)
  • 1.5 tsp. lemon juice
  • 1 tsp. parsley

Directions:

  1. Lightly salt and pepper the chicken
  2. In large skillet, sauté chicken and prosciutto in 2 Tbsp. melted butter until lightly browned and mostly cooked through. Prosciutto should be slightly crispy.
  3. Remove from pan and set aside.
  4. Melt remaining butter in pan and add shallots and mushrooms.
  5. Cook until mushrooms are lightly browned and reduced in size.
  6. Add Marsala and bring to a boil, scraping browned bits from bottom of pan.
  7. Add cream and lemon juice and return to a low boil.
  8. Season to taste with salt and pepper.
  9. Return chicken to pan for about 3 minutes to reheat and finish cooking.
  10. Serve over buttered basil fettuccine and finish with some parsley (also good with mashed potatoes).

This serves 4-6 people


Read more...

Sunday, February 13, 2011

Scissors Sunday: Heart Tin Pin Cushions

Hi everyone!  Jackie (tettletop20) here with today's edition of Scissors Sunday.  I've had this set of 3 heart tins for almost a year now and I just didn't know what to do with them.


That is, until I saw this blog post from Barbara Schram.  She shows you how to make them with traditional scrapbooking paper, however, today I am going to show you how to take one of Jennifer's kits (one of my favorite kits) - Sweetiekins - and use the papers from it to transform the tins.

First off, I opened up my photo-editing software (PSE 7) along with the papers I wanted to use and cropped them to the measurements I needed.


Then I printed them off onto cardstock and cut them out.  I adhered them to the tins with some red line tape.  Then I took some ribbon, flowers, and buttons that I had in my craft stash and adhered them with Zots.  I inserted the pretty pins I bought at the craft store and voila - aren't they pretty?  I am really in love with them!


I hope you have a wonderful day!

Read more...

Saturday, February 12, 2011

Saturday School - Using Alpha Sheets


Happy Saturday digi-scrappers!  Trina here with your Saturday School post, one that might seem simple but maybe will help you create faster!  Have you noticed the trend that lots of Alphas now are coming on a full sheet instead of being individual PNG files?  I've noticed this, and seen lots of people asking what is the best way to use these files, so I thought I'd share with you my way because I find it saves a lot of time!

Open your Alpha Sheet – I’m using the alpha from Jennifer's collab with Nikki - A Boy named Trouble.


Select your marquee tool, rectangular or ellipse, whichever will be easiest with the alpha you’re using. You can use your lasso tool as well if you've got a steady hand (I don't!).


On your Alpha layer, draw a marquee around the letter you want – you may need to zoom in (Ctrl and + sign) to be able to select only that letter.  You will see marching ants appear around that letter.


Next, select your move tool


Drag the letter you have selected from the Alpha sheet onto your layout, just like you would any element.  Repeat for every letter that you need.  Resize the letters once you have all of them on your layout by holding down the Ctrl key and selecting the layers in the layers palette and dragging the corners to resize.  If you resize them all together they will remain the same height and width and you’ll avoid the funhouse look.  Add a drop shadow and place where you want them.

Tip: if a kit comes with both the sheet and individual alphas, you may consider deleting the individual characters – the files are exactly the same, and it will save some room on your hard drive!

Read more...

Friday, February 11, 2011

2/11/11 Friday Freebie!!

Hey Scrappers!
I'm Lori, one of the new blog girls on Jennifer's CT! I am so excited to be posting my first message to you all!

With Valentine's Day right around the corner, I whipped up a little frame cluster freebie using Jen's super cute (not quite a mini) kit - You Mean So Much. This is a great little kit. The papers are adorable, and all the elements fit together perfectly!


Click here to download
This would be a wonderful kit to scrap all those lovey-dovey pages! Oh and did I mention, this little cutie kit is retiring on February 15th? So make sure you head over to The Digichick and scoop it up before it is gone forever!

We love to see how you use Jen's products, so make sure you come back here and link us up to your layouts so we can make sure to give you lots of love!
Until next time everyone, keep scrapping {your} everyday!

Read more...
Related Posts with Thumbnails

Disclaimer

As a creative team member for several digital scrapbook designers, I have received their products for free in return for creating and posting projects (digital layouts, hybrids projects, etc). Many of the layouts you see here were done in conjunction with requirements for these creative teams. Please be advised that the products used were indeed received for free.
The Daily Scrapper - Topsites Best Scrapbooking Sites, Digital Scrapbooking, Scrapbook Supplies, Reviews, Awards
List of the Best Digital Scrapbooking Websites by Scrapbook MAX!SCRAPBOOKING TOP 500 The Daily Scrapper - Topsites Free Digital Scrapbooking

  © Blogger templates Newspaper III by Ourblogtemplates.com 2008

Back to TOP