Hey! Alix here, or as some of you know me, sassynsweet ;) I am *loving* my time as a guest CT member and seeing as it is drawing to an end *sob*, I thought I'd share a fun little photo tutorial I created with you all.
One of the best parts of being a photographer is there is always something new to learn! Even if you already know about a certain technique or tip, it never hurts to practice, so go ahead and give this one a try!
One of my favorite techniques is when part of the picture, usually something in the foreground is sharp and the background is blurred. I like how a nice soft background will contrast with your subject and it really helps to make the photo 'pop'. Kinda like this:

In order to get a nice soft background, you need to use a bigger aperture, like f2.8 or f4, because smaller apertures mean more of your background is in focus. Obviously this is easier if you have a dSLR camera, but for those of you with point and shoots you can fake it using photoshop and I’m going to show you how!
First choose a picture that has a distracting background that you would like to tone down. I am going to use this one:

First duplicate your photo, because you should never work with the original! Now just like with everything in photoshop there is more then one way to do this, but I am going to show you my favorite way.
Using your magnetic lasso, being by selecting a starting point on your image, then follow as closely along the subject as you can (if the magnetic wand chooses something you don’t want then just click ‘backspace’). You can also click along the subject to make the selection points if you’d like or the magnetic lasso is having a difficult time with a certain area. Once you make your way back to your starting point, the ‘marching ants’ will show up. Like this, here it is up close:
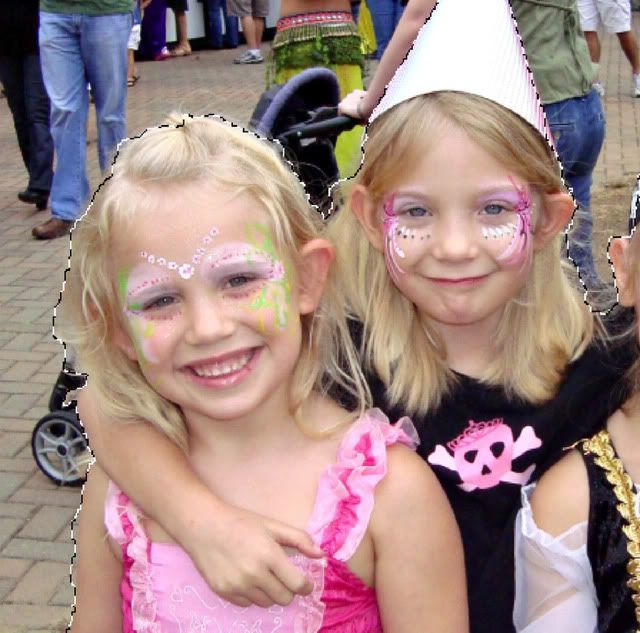
Again, there are probably several ways to do this part, but I’m just going to show you the way I am most comfortable with.
Click on Filters --> Blur --> Lens Blur
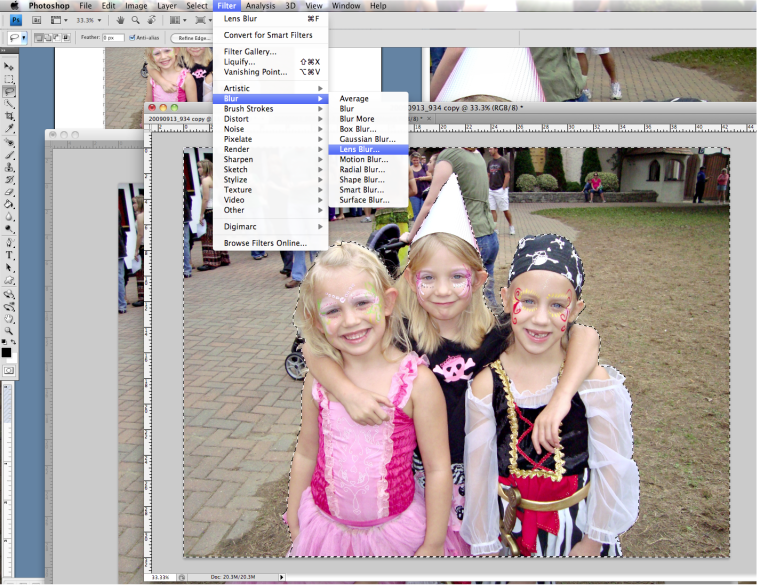
Adjust the settings to your liking, I changed 'radius' to 30, but I didn’t change them much from the default.
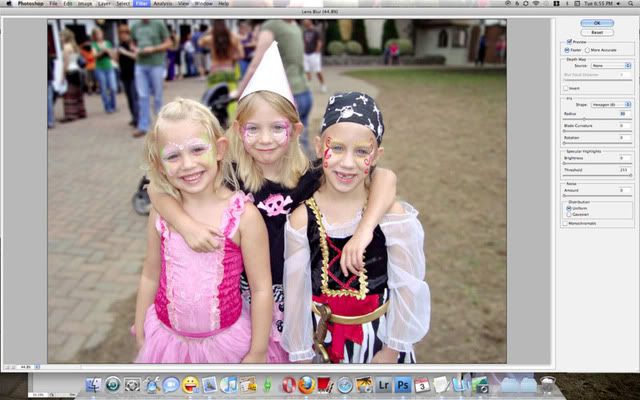
Here’s it is after the filter is applied

And the before and after:
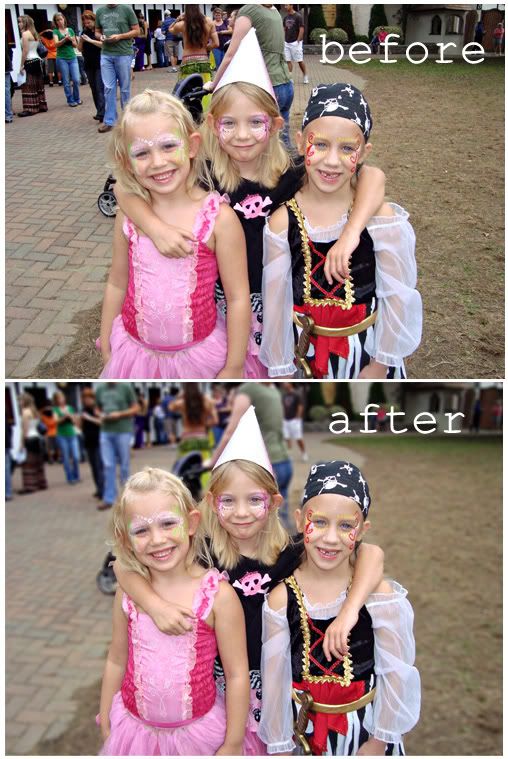
Whew! If you made it this far, thank you! I hope you enjoyed this tutorial, it was my very first, so thanks for being my guinea pigs! If you try it out post a link to your photo in the comment section, we'd love to see them!!
{Hugs}
Alix
Read more...




 You won’t want to miss this jam packed weekend! The Design Team and the Sugar Plums have some fun and exciting games, challenges, and chats planned. Check out all the happenings:


