Showing posts with label Photography. Show all posts

Saturday, April 2, 2011

Saturday School: Tips for Scanning

Hi Everyone!  Jenn (jk703) here to share a few tips with you!  So happy it is Saturday!  The end of the month is always a lot of work for me so I'm planning to get my scrap on this weekend and relax!

I'm sure that you are like me... you have so many pictures to scrap, but there is a part of you that wants to scrap the past... pictures that are not digital.  I've been thinking about putting together an album for my parents about their own parents.  I want to record things about my grandparents from THEM, and then share it with my parents.  I think it would be a treasure for when they are not around.  So, you have all these old pictures - what to do?  Buy, borrow or steal... ok, no stealing please... a scanner and get it all hooked up. There are a few guidelines when scanning pictures, memorabilia, negatives or most anything so that you can get the best scans possible.

Top Scanning Tips:


Cleanliness
Keep it clean, the glass, scanner itself, and the area around your scanner.  Dirty areas lead to dirt on the scanner glass, which in turn leaves problems with your scanned images. Check the items that you are scanning for dirt, lint, and smudges.  This will help when you edit the images later on.

Positioning
Carefully smooth away any creases, and bent areas to prevent a skewed area or distortion of the scanned image. Place your image face down on the glass, and position it as the scanner indicates.  Most scanners have a preview button.  Run the preview to see what it will look like.  Re-position as necessary. You want to look to see if the photo is straight, no smudges or lint, and to make sure that you got the whole image.

Scan Resolution and Storage
You will need to determine what resolution you want to scan your items.  The best resolution will depend on how you will use/save the image. Whether they will be printed, saved, or displayed needs to be determined before scanning. A good rule of thumb is to scan your photos at a minimum of 300dpi to really get a decent quality, or 600dpi or greater is even better for storing these images on CD or DVD. Check that you have ample space to store your images... a 4x6 image at 300 dpi is about 5-6 MB.

Edit: After
There are so many things that you can do to photos nowadays, that you should scan the image or item in without making any corrections before or during the scan.  The rule of thumb about scanning is that you Scan, Save, Play.  Scan your image in, save your image, and then tweak your image.  You can adjust brightness, contrast and all the other little edits after it is scanned and saved.  Scan in original format.. and color... you can go from color to black and white, but it is much harder to restore the color later on down the road.

Back Up
Save your images, and then back them up in another location other than your hard drive.  You will thank yourself the day you start having computer problems. Simple and so effective.


I hope you can go and pull out some old images and scan them in.  I'm going to pester my grandparents for pictures of them as kids and growing up, as well as pictures of my parents!
If you have any questions, let me know.  I'll be sure to help you out!  Have a great Saturday everyone, and thanks for stopping by!

Jenn
(jk703/The Typative Scrapper)

Read more...

Wednesday, February 16, 2011

MCP Photo Actions

Hi everyone, Terra here to share one of my favorite places for Photography Actions with you. I have a little bit of an obsession with Actions at the moment and one of my favorite sites is MCP Actions. I am not a Photoshop expert but I just love how easy it is to transform a photo with a good action, and MCP Actions are some of the best. The site also offers additional training and tutorials and is a great reference for anyone interested in improving their photos. There are several free actions on the site if you are just starting out. The latest freebie is the Mini Fusion Photoshop action, available for Photoshop and Photoshop Elements. With just one click, you can change the colors in your photo from dull to vibrant. It is highly customizable and a lot of fun to play with. So if you love actions or are just hearing about them for the first time, make sure you visit the MCP Actions website. I hope you'll like it as much as I do.

Read more...

Saturday, February 5, 2011

Saturday School: Watermarking

Hi Everyone! It's Jenn (jk703) here to bring you this edition of Saturday School!  Woot!  How is your weekend going! I hope well! Since I've started digital scrapbooking, I've noticed that I'm really getting into my cameras, photo actions and the actual editing of my pictures! I like to take different shots, fun angles, and try out the different settings on my camera!

Since we have so many photographs we are posting to show-off online, like the popular P365 challenge or a even a single picture challenge in the digital scrapping forums, there may be times that you want to protect your photographic work!  What I mean about protections is trying to disable people who might want to use them without your permission. Today, many photo sites that you are uploading your photos too also provide options for protecting your work. They offer an option to disable the "Right Click Feature" is really a helpful tool! One that is available to us, and easy to do ourselves is Watermarking!

Watermarking has it's good and bad points, but it is your decision. Here is a quick list of pros and cons.

No Watermark:

  • Watermarks sometimes are considered annoying and distracting to the image.
  • If someone wants to “steal” the image, they can likely remove the watermark anyway.
  • The image may not hold specific value and you just want to share it.
Add Watermarks:
  • A watermark is a notification that the image is protected under a copyright.
  • Watermarking is part of showing your brand.
  • If someone does take the image and forward it to someone else, they will see it and may go to your site based on your watermark.
  • There is also a notion that adding a watermark makes you appear professional. (That is more of an opinion). 

How to Add a Text Watermark in Photoshop:
Open the photo you wish to protect. 
Decide on what you want to type on your image. 
Select the Type tool and enter the copyright symbol or other piece of text you decided on for your watermark. See below for HOW!  For my example, I used the font named Trubble. 


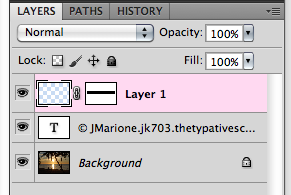
Create a New Layer above your text.

With the New Layer Selected, use the Square Marquee Tool and make an outline of your watermark-to-be.  Click Select > Inverse.

Click the Add a Layer Mask Button.


Then you will click and select the Text Layer and your Mask Layer. Both should be highlighted. Merge these two layers. 

 Change the Opacity as you like. 

Optional 
Create a New Layer UNDER your Watermark Layer. 
Use the Rectangular Marquee Tool to make another rectangle around your watermark.
Select the rectangle by clicking on the icon in the Layers Palette.
Use the Fill Tool and fill the shape with the color of your choosing.  
Lower the opacity to what you like.  

Tips:  
  • The Windows keyboard shortcut for the copyright (©) symbol is Alt+0169 (use the numeric keypad to type the numbers). The Mac shortcut is Option-G.
  • Remember to click on the Color Swatch and set the color to 50% gray or another color of your choosing. 
  • Take the time to resize and place the text where you desire. 
  • Save the watermark as it's own file or png to use it over and over again!  
Don’t feel like putting in the extra time to place your watermark on many different images? There are so many free sites and software that will allow you to “cheat", saving you a lot of time and energy. This is also a nice alternative for those who do not have Photoshop on their computer. 

Hope this was helpful to you!  Enjoy the rest of your weekend!
Thanks for visiting!
Jenn (jk703)


Read more...

Tuesday, February 1, 2011

Tidbit Tuesday - Stuck in Customs

Hi everyone, Terra here to share one of my favorite websites with you. I have been a fan of the Stuck in Customs travel photography blog for many years. It was one of the first sites that I subscribed to and has continued to amaze me ever since. I haven't always been a huge fan of HDR photography, but this site forced me to reconsider my opinion. The site features stunning, daily photos from around the world taken by the site owner, Trey Ratcliff. The photos are simply amazing and make me want to book a vacation as soon as I see them. The site has additional goodies as well such as an HDR photography tutorial, eBooks, camera reviews and so much more. So if you have never been to the site, check it out, maybe it will become one of your favorites too.


Read more...

Tuesday, January 4, 2011

Tidbit Tuesday - Back up your files

Terra here with a new tidbit for you. While visiting with friends and families over the holidays I heard a horror story - one of my relatives lost all of her pictures of her 3 year old son that she had taken since the day he was born. I was devastated for her. The sad thing is that a lot of people don't think about backing up their photos and other important files until something catastrophic happens. I know that I don't want that to happen to me and I don't want it to happen to any of you either. So for today's tidbit I am going to remind you of some ways to back up your files.


Make sure that you always have at least 2 copies of any irreplaceable file. Here are some of the options available to you:
  1. Burn to CD/DVD - These disks are inexpensive and often readily available and are a good choice for quick backups. However, I have heard that they have a relatively short shelf life (6-7 years) and are vulnerable to scratches etc.
  2. Save to an external drive - External drives are so much cheaper than they were in the past and I thoroughly believe that everyone should have one as part of their computer system. You can get a good 500 GB drive for under $100 (or even less if you shop around for a good deal). My external drive backs up my important files automatically and setting it up was so easy. Another option is to purchase a USB drive to specifically save important files. The only drawback is the size of USB drives. I just know that I would lose it in no time.
  3. Use an online storage service - There are so many options available when it comes to storing files online. I believe that it is important to save important files to an offsite location - in case of theft or natural disaster - and online storage is extremely secure these days. If you are interested in storing any type of file, Mozy is an inexpensive option that allows automated backups. However, if you are only interested in backing up photos, I recommend using a photo storage service like Smugmug. Note that you should never use your web host for file backup as it may violate your web hosting agreement.
These are just some options for backing up your important files. I encourage you to do some research before deciding which backup method is right for you. Don't wait until you lose your files to make backing up a habit!

Read more...

Tuesday, December 28, 2010

Tidbit Tuesday

Oooooooh boy, have I got a cool gadget for you!  I't Jenn (jk703) here with your Tidbit for this Tuesday!  Many sales are going on now, and I think you could probably get a great deal for this little piece of joy!


We've all got cameras, and we use them constantly!  I take oodles and oodles of pictures!  All the time, and they total in the thousands!!  I'm sure that a lot of you are just like me!  Then, after I take all those pictures, I have to upload them to my computer so I can edit, share, or scrap them! I used to hate taking all those cords out, finding the right ones and making sure it is all connected correctly!  But then... aaaaaahhhhh... I found these little wonders:

They are called Eye-Fi Cards!  Simply, they are awesomeness that is about the size of a postage stamp!  What do they do?  Well, I take my pictures, come home, turn on my computer and turn on my camera.  The Eye-Fi card will AUTOMATICALLY transfer my images to my computer. INSTANTLY!  No cords, no connections, just instant photo upload!  

For my personal use, I upload to my computer and leave it as it.  Later, when I am sitting down and plan to work with my photos,  (I have a Mac and I run multiple photo libraries) I click on my Photo Manager and choose the correct library that I want my pictures to be saved at, and once it loads, it also loads my new pictures!  WOW, right?!  

You can choose different options for the card, as well as choosing instant uploads to other outside websites, such as Facebook, Shutterfly, Snapfish, Flikr, or one of 20 other sites!!!  Depending on the card you choose, you can do video also!  Here is a chart that shows the differences between the cards!  


If you can, go check them out!  They really are as easy as that, and make my life so much easier that I don't have to do go through the processes of uploading photos - cause all I have to do now is press a button!  

Let me know what you think!
Have a great day!
Jenn
(jk703)


Read more...

Saturday, December 25, 2010

Saturday School: Christmas Edition

Hi Everyone! It's Jenn (jk703) here for a Christmas edition of Saturday School! First, everyone one here at Jennifer Fox Designs would like to wish you and you a very Merry Christmas! I hope that you are enjoying the gifts, family, friends, and food that is all about! 

So, with all that food around, I am sure that there are photos of friends, kids, or even you with food on your face! Well, today I am going to touch on the Healing Tool and we can remove those food spots, as well as cuts, acne or even lighten skin! Such a cool tool, and my best friend if I have a blemish on my face! OK! Here is the Tool (such a cute little bandaid, right?!): 
Here is a picture of my son, Shayne, eating a pretzel with mustard when we visited Touch a Truck day earlier this year! Now, I know you are thinking... where is the mustard... it is there, and it bothered me, so this was a great example of removing the "food blemish!" lol! 
This close up shows that it is there, and it is actually in a few places: left corner, left spot on his cheek, right bottom smudge, and there is a small cut on his nose and cheek. He's my cute slob! :)

The healing brush is used remove blemishes. It gathers information from the immediate surrounding area that we are altering and then it will blend it to make the changes smooth and very unnoticeable - if done correctly.

To make things more beneficial, we need to use the right kind of brush. If you have the brush set at a high hardness, the changes that you make will show. I normally use a hardness and spacing of 20%, the size will change as you work so there is not a set size for this. Please know, it will take time to experiment with these settings, these are just what I find most effective. For this example, I adjusted my hardness a bit higher. 
You may notice that my brush size is pretty small. When fixing blemishes, you will want to zoom in pretty close to make the best changes. The small brush size is effective at that level of closeness.

This is the Healing Brush Tool menu bar:


Mode Specifies the blending mode. Choose Replace to preserve noise, film grain, and texture at the edges of the brush stroke when using a soft‑edge brush.
Proximity Match Uses pixels around the edge of the selection to find an area to use as a patch.

Create Texture Uses pixels in the selection to create a texture. If the texture doesn’t work, try dragging through the area a second time.

Content-Aware Compares nearby image content to seamlessly fill the selection, realistically maintaining key details such as shadows and object edges.


This is the Spot Healing Brush Tool menu bar:


Mode Specifies the blending mode. Choose Replace to preserve noise, film grain, and texture at the edges of the brush stroke when using a soft‑edge brush.

Source Specifies the source to use for repairing pixels. Sampled to use pixels from the current image, or Pattern to use pixels from a pattern. If you chose Pattern, select a pattern from the Pattern pop‑up panel.

Aligned Samples pixels continuously, without losing the current sampling point, even if you release the mouse button. Deselect Aligned to continue to use the sampled pixels from the initial sampling point each time you stop and resume painting.

Sample Samples data from the layers you specify. To sample from the active layer and visible layers below it, choose Current And Below. To sample only from the active layer, choose Current Layer. To sample from all visible layers, choose All Layers. To sample from all visible layers except adjustment layers, choose All Layers and click the Ignore Adjustment Layers icon to the right of the Sample pop‑up menu.

Removing Blemishes
So, here are some steps to removing blemishes and other unwanted marks on your photos!

Open up your photo, and create a duplicate of the original so that if you don't like the changes, you still have the original to go back to!
  1. Choose the Healing Tool, and note that the Background layer should be the active layer. 
  2. Zoom in close to the area that you will be working on. 
  3. Move your cursor NEXT to the blemish, to a nearby "Clean" location. 
  4. Press the Alt Key (Option for Mac) and hold it. Click with your left mouse button. You will see something similar to a bullseye when you do this part. You now have a made a sample that you will use to cover the blemish.
  5. Next, you start clicking on the blemish to change/fix it. 
  6. Re-sample often and near to the blemish -- it will appear smooth, and doesn't look blotchy when you continue to re-sample. 
  7. Sometimes, changing the opacity helps in making the changes seem more realistic. 
For this example, I left my tool in the Normal mode. If it was a dark spot, I might choose lighten, or if it were a light spot, I might choose darken. Play around with the options, and find your style!

Here is the Before and After of my Mustard Mouth! 


There you have it... a quick and easy blemish fix! I hope you learned something, and I would  LOVE to see what you were able to remove from your photos!  

Enjoy your holidays, and have a great week! Till next time!

Jenn
(jk703)

Read more...

Tuesday, December 21, 2010

Tidbit Tuesday - Plan your Christmas photos

Hi everyone, Terra here with another Tuesday Tidbit for you. With all of the hustle and bustle during Christmas it is easy to forget to take photos of some of the things you want to remember. So this year, I am hoping that some advance planning will help me out. I have started a list of "must have" photos as this is my first Christmas with my little boy. I know that I am most interested in the spontaneous, unplanned photos, but if I don't make a list of the photos I want, I am sure to forget to capture some special moments. These are some of the pictures I want to have to look back on (and scrap) after the holidays are over. Hopefully this list will inspire you to make a list of your own and help you think of some of the moments you want to capture.

Equipment Preparation
  • Extra batteries
  • Clear memory card
  • Review camera manual
  • Clean camera and lens

Must Have Photos
  • Tree decorated with lights on. Take just before dark without flash.
  • Baby's First Christmas ornament, Charlie Brown ornament and Peter Pan ornament
  • Gifts under the tree
  • Kids opening gifts
  • Kids with their Christmas outfits on
  • Kids playing with wrapping paper, bows, etc.
  • Baking cookies
  • Mom preparing Christmas dinner
  • Christmas Eve games
  • Kids and Grandpa writing letter to Santa
  • Treats for Santa and reindeer
  • Christmas dinner
  • Carving the turkey
  • Christmas lights
  • Kids playing outside at night
  • Bedtime stories
  • Kids asleep on Christmas Eve
  • Kids walking to Christmas tree when they first wake up
  • Opening stockings
  • Opening gifts on Christmas morning
  • Kids with Grandma and Grandpa
  • Kids with Aunt and Uncle
  • Family portrait

Let me know if I've missed anything in the comments!


Read more...

Saturday, December 4, 2010

Fun Smartphone Camera Apps

Hi everyone! Terra here with my first Saturday School post.

I have a good camera, but I often find that I take more pictures with my iPhone. I'm even considering doing Project 365 solely with iPhone photos next year. There are some amazing camera apps available and I thought it would be fun to highlight some here. But just to be fair, I'm including some apps available for the Android and Blackberry as well.

iPhone Apps

CameraBag

CameraBag was one of the first camera apps that I got for my iPhone 3G a couple years ago and it is still my favorite app. It isn't free, but at $1.99 it is still affordable, and in my opinion well worth the price. It is very easy to use and includes 11 different filters. I've even saved photos to my iPhone just so I could use the filters. It's a really fun and versatile app.


Pocketbooth

Getting your picture taken in a photo booth is always a lot of fun and the Pocketbooth app lets you create similar images with your iPhone. It makes strips of 3 or 4 images with either a black or white border on matte or glossy paper. There are also other settings for different picture styles and can be lots of fun for everyone.


Hipstamatic

When thinking of fun camera apps on the iPhone, Hipstamatic usually comes to mind as it has quite a following online. It offers lots of different customization options from different lenses, to flash, to film. This app has built-in Facebook and Flickr sharing and you can email photos directly from the app. I really like the artistic feel to the images but it isn't the most inexpensive app. The app costs $1.99 and additional Hipstapaks (lens, flash and film combos) are available for 99 cents each.


Retro Camera (Available on iPhone and Android)

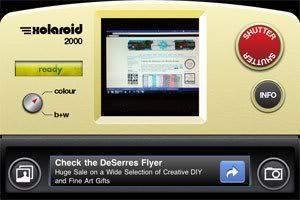
Similar to Hipstamatic, Retro Camera is a really cute app that turns your phone into a fun, toy camera. It instantly turns your phone into one of 5 different cameras and best of all it is free. I love everything about the interface and it is so much fun to play with. All of the cameras take pictures with a unique vintage feel based on various "toy" cameras, from the Lomo to Polaroid.


Android

FxCamera

FxCamera lets you apply a fun effects such as ToyCam, Polandroid and Warhol to photos and is very similar to CameraBag for iPhone. It is one of the best apps on the market and even though it is a bit more basic than other Android camera apps, it is free.

Vignette

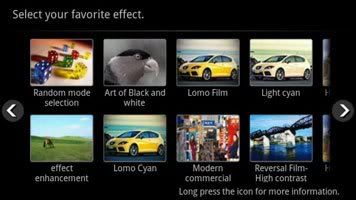
Vingette has more features and is more versatile than FxCamera. It is a good replacement for the default camera app since it supports high resolutions and add several different effects and frames. You can either take a regular photo and edit it afterwards or take a photo with a pre-selected effect. As it has 62 built-in effects it can alter photos in many different ways. You can also save favorite effects for quick access. At under $4 it seems like a great deal.

Camera 360

Camera 360 is also packed with many different settings and effects. It has 3 different lomo options for photos with vintage feel. It also supports HDR and axis shift photos. This app is also free so it is worth a try if you own an Android.


Blackberry

I have to admit that it wasn't easy to find fun camera apps for the Blackberry. It doesn't seem to be an area in which the Blackberry excels. If I am wrong about this, please let me know!

Popular Photo Tools

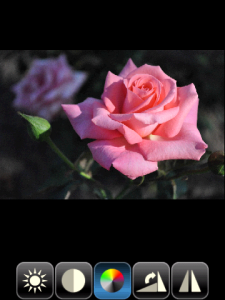
Popular Photo Tools allows you to do basic photo editing such as editing the contrast, converting to black and white and adjusting brightness levels. It is a handy app to make simple adjustments to photos and it looks like additional features are in the works.


iTookThisOnMyPhone

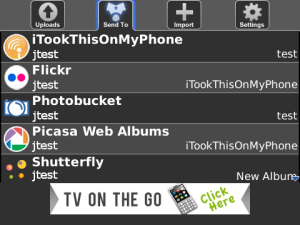
This free app allows you to easily share your mobile photos on many different sites, including Facebook and Twitter. It can also optionally add GPS location information to your photos. It also offers you a place to store your photos online for free in public or private albums.


These are just a few of the apps available for the various smartphone devices. Do you have a favorite app that I didn't mention? Leave a comment and let us know about it.

Read more...

Tuesday, November 23, 2010

Rule of Thirds...

Huh? You say.... lol... Well, I am talking about photos and how you take them!  It is Jenn (jk703) here again with a tip for photography!  Now, I am trying to learn as I go, so I need to practice my own tips as well!  But, through my research, here is what I've found to be useful!

First, let me explain quickly what the Rule of Thirds is.  It is the basic dividing of a photo into thirds...by rows or columns.  Though, in my opinion, it is more of ninths, because there are nine quadrants!!  LOL!  A lot of times when cropping, you will see the grid, like in my picture below:


Those grid lines can change your picture so much!  Right now, I've used the crop tool to crop the photo and place the sun in the center of the picture!  Kinds of looks funny! The Rule of Thirds is a basic assumption that you should place the primary parts or focus on the grid intersections.  I've cropped my photo, and added some red dots to show you how I aligned my photo!


I actually like the way it cropped.  The boat is off to the side and my sunset with reflections looks nice to the left a bit!  It provide a well balanced, but interesting photo!  Many cameras have a grid function that you can add for your viewfinder (Dslr) or on the Point and Shoot models.  Check your reference manuals!  Here are some more examples from a trip we took to the Florida Keys! On some, you will have to imagine the quadrants, lol!


Now, remember - this is just a guideline... many times rules are meant to be broken!  Here is an example.  I loved how this picture turned out of my Dad and cousin... with the scenery.  If I moved the photo based on quadrants, it didn't look right!  


Share some of your photos... post a link!  Have fun with your photos and be sure to come back for a visit soon!

Happy Holidays!
Jenn
(jk703)

Read more...

Tuesday, October 26, 2010

Tidbit Tuesday: Removing a Background

Hi Everyone!  It's Jenn (jk703) here with your tidbit for Tuesday!  I was here on Saturday and shared a little information on the Lasso Tool, and it's friends:  Polygonal Lasso and Magnetic Lasso.  I'm here today to share how to do a quick removal of a photo's background!  So bear with me and all the red that you will see shortly!  I sure should remember to change the mask color in Photoshop soon!  Goodness...

Anyway... Here is where we start! First, open the photo that you want to remove the background on.  Here is mine of my little boy, Colin!


Once you choose the Magnetic Tool, you should start clicking around the image that you want to stay, and the background behind will be removed. For my example, I am clicking around Colin's body, and moving around his clothes.  (Sorry, my screen capture below also captured me getting my selection, so I have a few extra magnetic tool squares, lol!):


Once you have clicked all the way around, you will get those fabulous marching ants... now -- who would have thought ants could be fantastic!  Once you are at this point, this is what you should see:


You can see though, in the image above, Colin's treasured stick was not fully captured.  So... if you press Q on your keyboard you will be brought into mask mode.  This allows you to easily make changes to the image and what is or isn't included within your marching ants.  Painting with white removes the ruby red mask, and painting in black adds ruby red to the mask. I need to remove the mask on the stick, so I am painting with white.  


Here is my full mask after I zoomed in and re-captured the stick in his hand. Looks funny right... I know... lol!  Now when you do this, you can go around to all the edges and be as specific as you like.


After you have completed mask edit, you can soften the edges by adding a slight Gaussian Blur to the image.  Still in the mask mode, click on Filter > Blur > Gaussian Blur.  Bring the blur down to .5 pixels just to soften the edges.  It is up to you how much you want to use, so play around until you find what you like!


Click ok, and the blur is set.  Next press Q to quickly get out of the Mask Mode.  You will see your image with the marching ants again.  Making sure your photo is selected, all you have to do is hit delete on your keyboard and the background will be removed to the clear pixel view.  Now, just add papers, put your image in a layout or you could blend it into the paper... so many ideas!  Here is Colin, removed from the woods!


Hope you enjoyed a quick way to remove a background from a photo!  You never know what you might catch behind your subject, it might be good to know how to remove it!  LOL!
Have a great Tuesday everyone!  Til next month!

Jenn
(jk703)

Read more...

Saturday, October 2, 2010

Saturday School - HDR

Raise your hand if you have heard the abbreviation HDR. Ok, not keep your hand raised if you actually know what it stands for and does. No worries, because this is going to be a crash corse in HDR. 

First things first, lets get this straight, High Dynamic Range. Now that we know this, here is what it means. Combining multiple photos with different exposures to create a beautiful photo. This may sound hard,  but don't worry, there is software out there to help!  My favorite happens to be Photomatix (but Photoshop CS5 has an HDR emulator and there may even be other softwares out there that will do the same).

Now that you know what it is and what software to use, here is how to do it all. It starts with taking the photos. For best results, you should take (at least) three photos. But wait, it's not that easy, we need to take them in different exposures. Either switch to manual mode on your camera or you can turn on bracketing (check your users manual if you are unsure as to how to do this). The order that you take the photos doesn't really matter. You will need one photo that has even exposure, one that is over exposed, and one that is under exposed. By doing this you are (hopefully) capturing the whole range of color in the shot. 

After taking the photos, import them into you computer and choose your software of choice. If you are brand new, allow me to peer pressure you into checking out Photomatix. You can download a fully functioning trial (and if you ever want to buy it it will remove that pesky watermark). Tweak the setting till you get the photo to look just right. Some people like to keep it really natural, and others will make it totally cartoon like. 

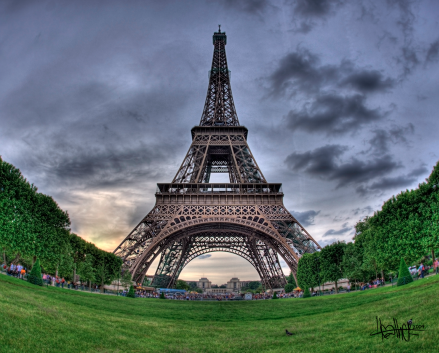
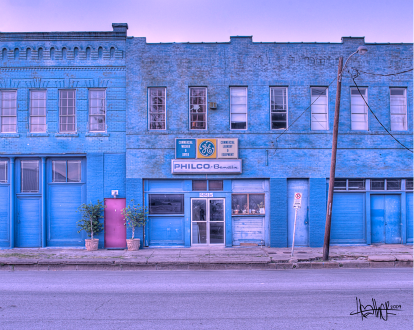
So what is a lesson without some samples: 


and it also does black and white: 


No go out and play with some HDR!

Read more...
Related Posts with Thumbnails

Disclaimer

As a creative team member for several digital scrapbook designers, I have received their products for free in return for creating and posting projects (digital layouts, hybrids projects, etc). Many of the layouts you see here were done in conjunction with requirements for these creative teams. Please be advised that the products used were indeed received for free.
The Daily Scrapper - Topsites Best Scrapbooking Sites, Digital Scrapbooking, Scrapbook Supplies, Reviews, Awards
List of the Best Digital Scrapbooking Websites by Scrapbook MAX!SCRAPBOOKING TOP 500 The Daily Scrapper - Topsites Free Digital Scrapbooking

  © Blogger templates Newspaper III by Ourblogtemplates.com 2008

Back to TOP